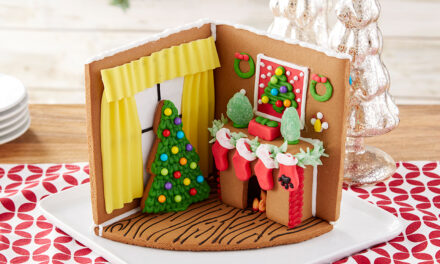
It’s beginning to look a lot like Christmas – baking! We’re here to help your pre-holiday planning by providing a handy list of Christmas cookie icing options. A common Christmas cookie question (besides “Are they done yet?”) is “What kind of icing should I use?” The answer is largely dependent on the kind of cookie, whether you expect that cookie to travel and where you fall on the question: does Santa prefer decorated or undecorated cookies? Very serious stuff. Let’s dive in!
Christmas Cookie Icing & Frosting
1. Homemade Royal Icing
Perhaps the most popular of the cookie icings, royal icing has many advantages: it’s easy to make, lactose-free, has endless decorating possibilities and it dries hard so that you can stack your cookies for transport. This recipe scores big with roll-out cookie lovers, since the sweetness of confectioners’ sugar balances nicely with a less-sweet cookie. It’s also the perfect icing for building and decorating gingerbread houses, a classic Christmas craft.

2. Wilton Cookie Icing
Our ready-to-use option scores big points with bakers on the go. It comes in a variety of colors, dries smoothly and comes in a squeezable, microwaveable bottle. Simply pipe the outline with icing straight from the bottle, then microwave to flood. Unlike royal icing, this icing doesn’t dry hard, so place them in a single layer on a plate or skip the extra cleanup by baking, decorating and serving them a cookie sheet!
3. Christmas Cookie Frosting
For dimensional decorations like wreaths and roses, or to give your cookies that cupcake mouthful-of-frosting appeal, buttercream is a versatile choice. Our vanilla recipe is a classic flavor that works wonderfully as a filling for sandwich cookies. Too vanilla? Get into the holiday spirit and experiment by using any of our many buttercream recipes to add flavor and bit of festive flair to your favorite cookie recipe.

At the end of the day, whether you want a shiny royal icing finish or a soft, boiled buttercream frosting filling, Christmas cookies are about baking the joy of the season into a yummy little package that delivers smiles to all who eat it. After all, smiling is our favorite.
Explore our favorite Christmas cookie decorating ideas, get inspired by some really and unique Christmas cookies, browse a fun list of really cute Christmas cookies for more cookie ideas, or take a look at any of our other cute Christmas desserts or easy Christmas cake ideas for more baking inspiration.
And if you’re making a slightly more ambitious holiday treat and need to know how to make the perfect gingerbread house icing, we can help with that too! Just pick out one of our cute gingerbread houses and get going!
Regardless of what you’re making, be sure to share your smile-worthy Christmas cookies treats with us by commenting below or sharing your photos on Instagram and tagging @WiltonCakes.

Christmas Cookie Icing Recipe
Equipment
- Electric Hand Mixer or Stand Mixer
- Large Bowl
- Spatula
- Small spoon
Ingredients
- 4 cups Powdered Sugar about 1 lb. (confectioners' sugar)
- 5 tablespoons Warm Water
- 3 tablespoons Meringue Powder
- Gel Food Coloring optional
Instructions
- Beat all ingredients together until icing forms peaks. Beat for about 7-10 minutes at low speed with a heavy-duty mixer or 10-12 minutes at high speed with a hand-held mixer.
Add Color (Optional)
- Add food coloring using a toothpick. Add the coloring before diluting the consistency, because the color may contribute to watering it down.
Check Consistency
- At this point, check the consistency of your royal icing. If icing is too stiff, add more water, 1 teaspoon at a time, until desired consistency is achieved. If icing is too thin, add powdered sugar, a little at a time, until desired consistency is achieved.For cookie outlining consistency: Add 1/8 teaspoons of water for every cup of stiff icing. Use a flat utensil like a small angled or straight silicone spatula, to mix icing in a figure-8 motion. Avoid beating or mixing vigorously.For cookie flooding consistency: To thin for pouring, add 1 teaspoon water per cup of royal icing. Use a grease-free spoon or spatula to stir slowly. Add 1/2 teaspoon water at a time until you reach proper consistency. Use a flat utensil, like a small angled or straight silicone spatula, to mix in a figure 8-motion. Avoid beating or mixing vigorously.10-second test: Take some icing on a spatula and drop it back down into the bowl to check for the correct thin consistency for flooding. If it sinks after a full count of 10, then the consistency is thin enough for flooding.
- Let icing sit for 15 minutes to an hour to let air bubbles rise naturally. Alternately, tap the bowl on the table several times to force the air bubbles up. Gently stir the top surface to release the air.

