Summer is here – it’s time to hit the beach or have a beach party! What’s a beach party without a beach cake? Here are a few ways to make key features for your themed cake. First and most important are sand and water.
SAND
You can use a number of different products to make sand. I have used crushed graham crackers, crushed vanilla wafers or teddy bears (or any of your favorite light brown colored cookies), and brownulated sugar. To make those white sandy beaches, try using crushed shortbread cookies.
To add a little sparkle to sand, mix in some white Sparkling Sugar or white Cake Sparkles™ with your cookie crumbs.
WATER
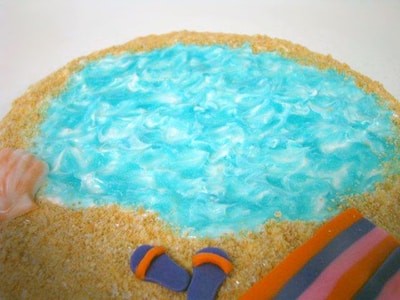
To get that translucent look, I use tinted piping gel. Simply pick your desired blue icing color and mix with piping gel. Be careful – piping gel is clear and it doesn’t take much to color it. Start out with a small dab of color and slowly mix in more until the desired color is reached.
If you don’t want to mix your own piping gel, Wilton Sparkle Gels work great. They are available in a variety of colors, and they add a nice shine to the water. Wilton’s new light blue Sparkle Gel makes great beach water.

There are several ways to make waves. One way is to ice your cake smooth with white icing. Wherever your water is going to be, add a little bit more icing on top and make small random wavy motions in the icing using an angled spatula. Cover with tinted piping, spreading lightly with a spatula. If needed, re-create waves using a wavy motion with a spatula.
Another way to make waves is by using the tip of the spatula and make peaks. I press the tip lightly into the area where my water will be and pull straight up. It’s an up-and-down motion, kind of like I’m patting the cake with the tip of the spatula. Cover with piping gel and do the same motion again to emphasize peaks making waves. It’s OK if the white icing shows; it adds depth.
If you prefer not to use piping gel, you can do one of the techniques listed above to make waves using different shades of blue buttercream icing. I like to use a light blue shade with a medium shade blue.
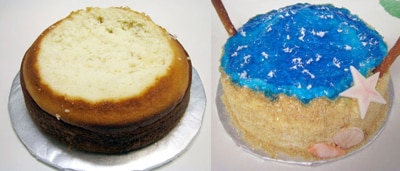
Another option is flavored gelatin. Make a slight well in your cake where the water will be. Use a knife to cut out the cake, or use a spoon to scoop out the cake. Ice the cake smooth with buttercream and add a small rim of icing around the cake with Tip 10; let set until it crusts over or put in the refrigerator to firm up the buttercream.
Make gelation using 1 cup of hot water and 1 cup of cold water to 1- 6 ounce package of flavored gelatin (berry blue flavor works well for me). Make according to the package directions and let set in refrigerator until slightly gelled. When you tilt bowl to side, it should cling to bowl but still move slowly as a whole. Pour or scoop the flavored gelatin into the well on your cake. Let set completely in refrigerator.
To add more depth, use a spatula to dab a bit of buttercream on top of some waves. A little note: unfortunately this does not work directly on fondant as the added moisture starts to break down the fondant.
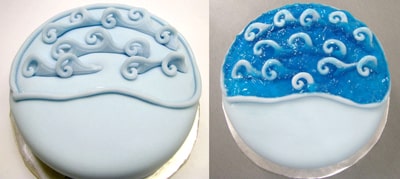
Another way to make more dimensional waves is using our new Sea Life Fondant and Gum Paste Mold. Cover your cake in Wilton’s Ready-To-Use Pastel Blue Fondant. Make several molded waves from the fondant mold following directions on package. Make several slits in fondant on the cake where you want waves. Insert cut strips of waves into cake. Roll a small log of fondant and place around where water will be. If you want the waves to stand up more, add Gum Tex to your fondant before making waves and let set. In a cut disposable decorating bag, pipe piping gel over waves and around the cake. Using a spatula or decorator brush, brush piping gel (or sparkle gel) up on waves.
In my next blog post, I’ll share some of my favorite techniques for adding seashells and palm trees to beach cakes.
Have you decorated a beach cake? What techniques have you used to create water and sand features?