
The cake is baked and decorated – now it’s time to party! Whether you’re traveling 20 miles or 20 feet, these helpful tips and tricks about how to transport cakes will help ensure that your treat gets to wherever it’s going safe and sound.
LET’S START OFF WITH A FEW BASICS:
- All about that base. Make sure to secure your bottom layer to the cake board or platter using a little swipe of buttercream frosting. This will prevent your cake from sliding off the base.
- Choose the right size board for the job. You want to use a cake board that measures at least 2 in. bigger than your cake. For example, if you’re transporting an 8 in. cake, use a 10 in. cake board. This gives you some extra room for moving the cake in and out of the box and prevents your decorations from getting smudged against the side of the box.
- Speaking of, double (or triple) up on those cake boards. A little extra support can go a long way, especially if your cake has more than one tier. For tiered or heavier cakes, we suggest taping two or three cake boards together for extra stability.
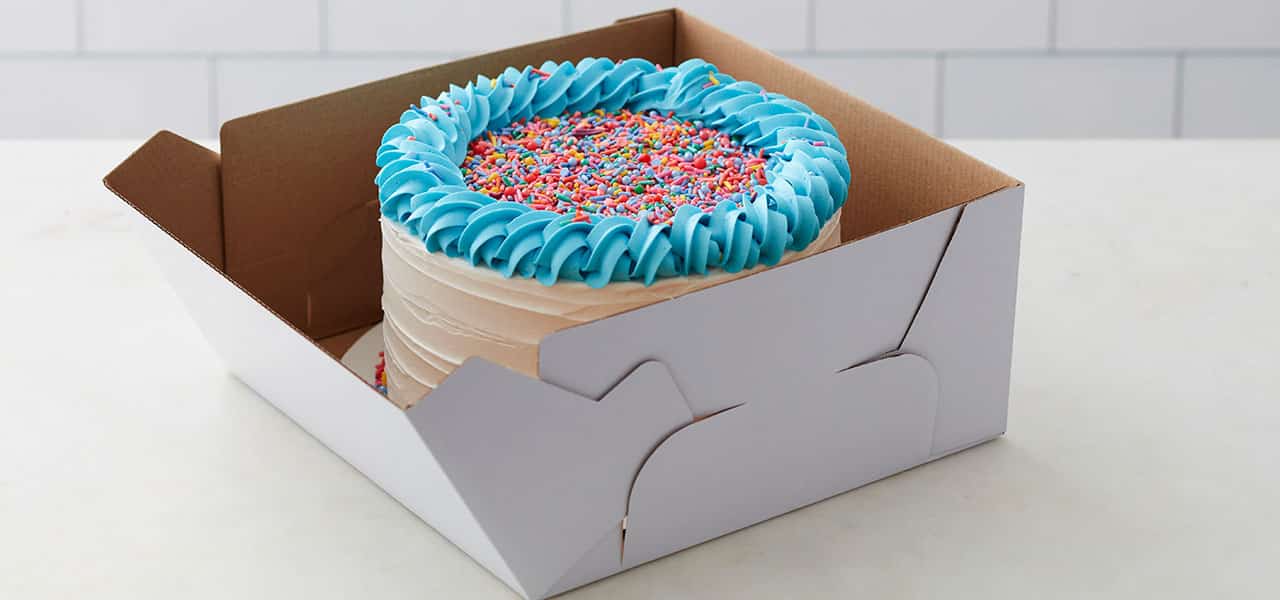
- When it comes to the box, size matters. For a snug and safe fit, try to use a cake box that’s the same size as your cake board. If your box is slightly larger than your board, use a non-skid mat inside the box to prevent your cake from sliding around. Also, don’t forget to account for height. Select a box at least 2 in. taller than your cake, especially if it’s piled high with decorations.
- Package decorations separately. If you have gum paste flowers, fondant decorations or candles for your cake, package those separately and place them on your cake once you’ve arrived at your destination.
Once your cake and decorations are packed, you’re ready to hit the road! There are a few things you can do during this stage to make sure your cake arrives ready to serve.
PLANNING AHEAD
- Whether or not to consider the weather. Cake, icing and filling are all sensitive to heat and cold. If you’re traveling a long distance in the summertime, you may want to avoid using Swiss meringue buttercream or cream cheese frosting, which are sensitive to heat.
- Let your host know if you need fridge space. If your cake needs to be refrigerated when you arrive, make sure you call ahead and let your host know to make some room in the fridge!

SUPPORTING AND PACKING
- Time to chill! To make it easier to handle buttercream cakes, you can chill it in the fridge or freezer before transporting. This will make the surface of your cake less likely to smudge when packing your cake.
- Build your box around your cake. Rather than building your cake box separately then trying to find a way to drop the cake in without smudging it, try assembling the cake around the box. Simply place the cake (on its board) on the flat bottom of the box, then build up the sides and tape it closed.
- For added support and stability, use a cake carrier. If you want to give your cake added protection, try using our cake carrier. With three locking latches and a sturdy handle, this carrier is great for transporting heavier cakes up to 5 in. tall and 10 in. round.
- Travel first, build later. If your cake has more than one tier, package each tier separately, then assemble your cake once you’ve arrived at your destination.
- Plan for repairs. It also couldn’t hurt to bring a little extra icing, prepared decorating bags and a spatula to fix any smudges that happen during transport.
LOADING AND TRAVELING
- Check the car for level spots. As much as you may want to put the cake on the seat next to you, a slanted surface could cause your cake to slide off the board and into the side of the box. Instead place your cake on a flat, level surface, such as in the trunk of the car. For added stability, use a non-skid mat (or even that yoga mat in your trunk) to prevent the boxes from sliding around.
- Keep temperature inside and outside the car in mind. Cakes should be kept cool to prevent melting. If it’s a hot day outside, the air conditioning may not reach the trunk, so it might be safer to place the cake on the floor of the car to keep it cool. If it’s too cold outside, your icing may start to freeze and could sweat as it comes back to room temperature. A dab of paper towel should help with that, so add those to your repair kit if you’re traveling in the freezing winter months!
- Drive carefully! You put a lot of work into this cake, so make sure to avoid steep ramps, sudden stops and quick starts…and watch out for those speed bumps!
SETTING UP
- Slide, don’t lift. Once you’ve arrived at your destination, cut open the side of the box and slide the cake out rather than lifting it.
- Do one more quick check! Before serving, do one more spot check on your cake to make sure you don’t have to make any repairs. Add any decorations you brought separately and get ready to shock and amaze your friends!
Do you have any other tips and tricks for transporting cakes, pies, cookies or cupcakes? Let us know in the comments below or take a picture of your transporting hacks and tag us on Instagram @wiltoncakes. Safe (and sweet!) travels!


