

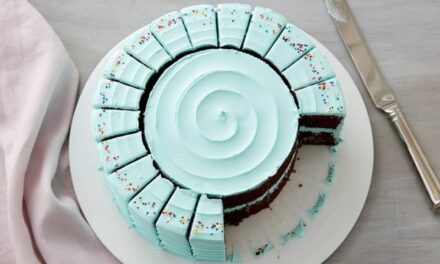
I recently made an ombre petal buttercream cake to celebrate a special baby shower for a co-worker here at Wilton. I have done this “petal effect” with buttercream before and wanted to add the look of ombre coloring. Creating the petal texture is a little time consuming, but a very easy technique.
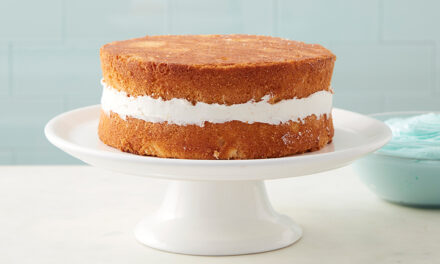
To begin, I baked a Vanilla Bean cake in two 9” round pans. Once cooled, I leveled, filled, and stacked the cakes on a cake circle and set on my turntable (I am in LOVE with my Ultimate Trim-N-Turn Caddy by Wilton).
Next, I made a double batch of Honey-Vanilla Bean buttercream icing and divided it in three portions. Using Wilton’s rose/petal pink icing color, I tinted each portion to a light pink, medium pink, and dark pink. I put each color into its own disposable decorator bag fitted with a coupler and snipped at the very tip. You could also use a bag with a 1A decorating tip inserted instead of a coupler.
Using the medium pink color, I lightly iced the cake with a thin coat of icing, making a smooth and even surface. While the icing was setting, I prepared my workspace set with a clean but damp towel, the three icing bags, a 9″ angled spatula, a small glass of warm water, and the cake on the turntable.

Beginning at the back and bottom of the cake, using the darkest pink, I piped 2 dots that were slightly larger than the width of the spatula. Using the tip of the spatula, I pressed firmly into one dot and smeared the icing to the right. After doing the same to the second dot, I piped 2 more dots near the end of the first smears and smeared the new dots. I repeated this all the way around the cake making sure to wipe my spatula clean and dip it in the warm water when needed.
Moving up the side of the cake, I repeated the process to make 2 rows of medium pink, and then 1 row of light pink top. Moving to the top of the cake I started with the lightest color and moved in a circle around the edge of the cake. After creating 2 rings of the lightest color, I made 2 rings of medium color, and finished with 1 ring of dark pink and a center dot to finish.

There is a lot that you can do with this technique to vary the results. Try putting your petals closer together or farther apart, or using a smaller tip and spatula. Maybe try going “up the cake” instead of around. Use one color or use multi colors and create a pattern. Try a square ended spatula to create a more geometric look or try the prongs on a fork for more texture.
To finish the last dot, I piped the dot and smeared it as far as I could without disturbing the next dot. It helps to pull the spatula away from the cake (so just the tip is touching). Then, using the tip of the spatula and coming from the other direction, I manipulated the frosting into the blank spaces that remain around the original dot.


The next day, I brought the cake to work in my Ultimate Trim-N-Turn Caddy (seriously LOVE this tool) and added a decorative topper and a few sugar flowers. I was thrilled with the results and received many compliments!

