

Hi friends! It’s Lyndsay from cococakeland.com! I’ve been using Wilton products since my very first attempts at piping cupcakes way back in 2007. I’ve since gone on to have a colorful career in baking and cake decorating, including publishing my first cake decorating book, Coco Cake Land: Cute and Pretty Party Cakes to Bake and Decorate! I’m excited to be able to share some fun ideas with some of these Wilton products.
It’s summer birthday season! Time for bright colors and fun! Instead of one large cake, why not two smaller cakes to double the design fun? I love how even though the cakes are very different in design, they share a really lively color palette, making them perfect for your next birthday bash!
Ever since I was a child, I’ve always loved buttercream flowers. They fascinated me because I had no idea how they were made. It wasn’t until I was an adult and discovered my love for cake decorating that I realized – piping tips! Piping tips have changed my life. They give such a clean professional finish (perfect for type A cake decorators like myself) and with practice, are really easy to use. I’m always learning how to make new buttercream flowers and wanted to try a simple blossom-themed cake.
Blossom Dot Cake

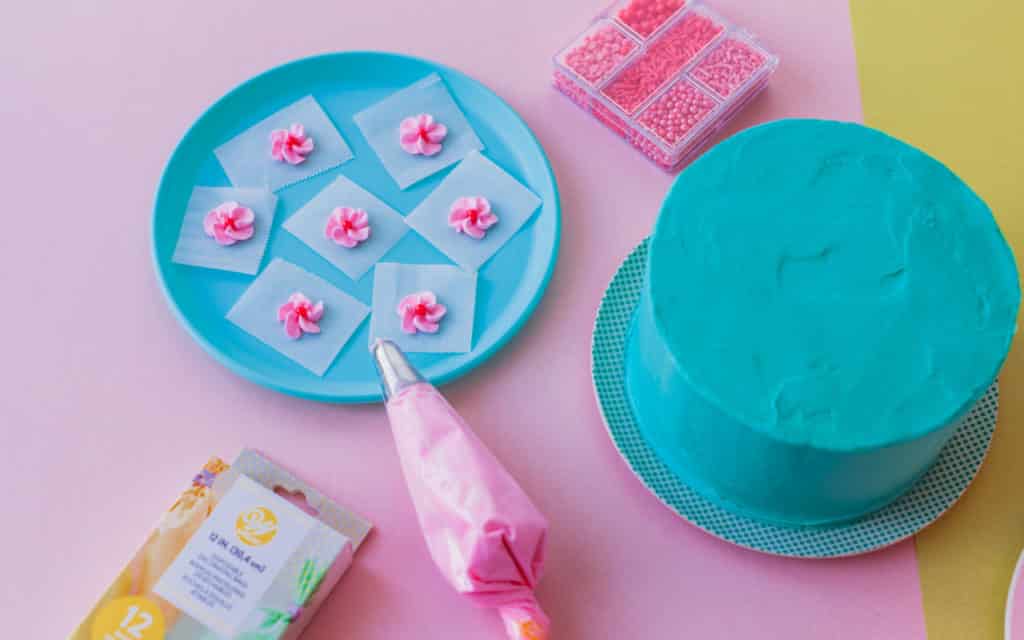
For the blossom dot cake, you will need your favorite cake and buttercream recipes, gel food coloring in pink and turquoise, Candy Melts candy for your polka dots, piping bags fitted with a 190 tip for the blossom and a 21 tip for the drop stars and rosettes, ball-shaped sprinkles for the blossom centers, a flower nail, and I also cut little 1.5-inch squares of parchment paper for piping the blossoms. Double your batch of buttercream to have enough for two cakes plus piping!
Divide your buttercream evenly into two bowls, coloring one bowl with turquoise gel color and the second bowl with pink gel color. You can use your discretion when adding color – just remember that one tiny drop goes a long way, so start with a little then add more if needed.
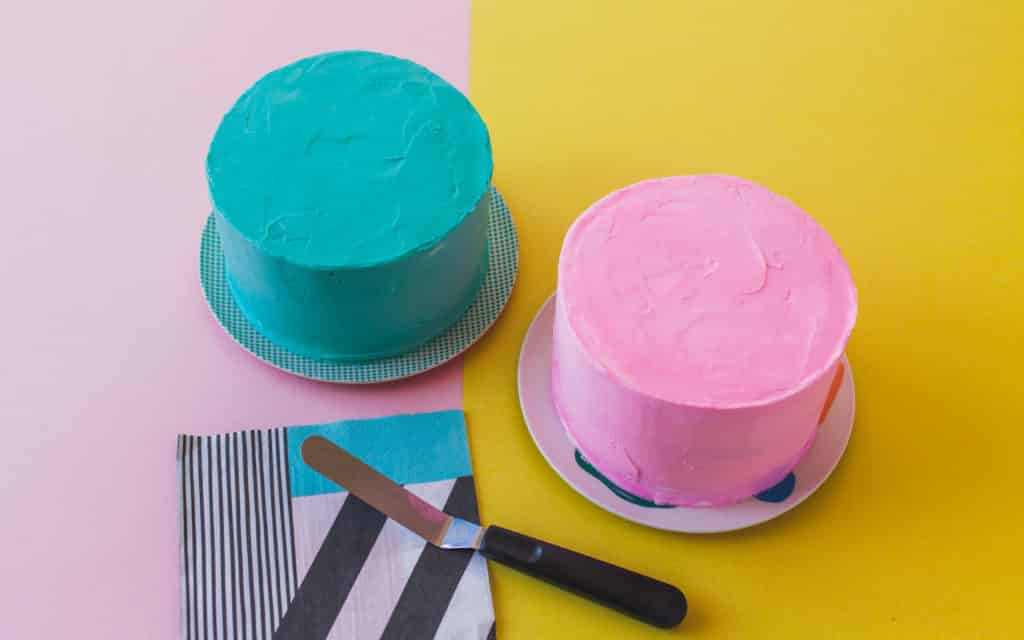
I made two 6-inch round three-layer cakes by dividing my cake batter into three 6 x 3-inch cake pans, and I used my Wilton cake leveler to cut my baked and cooled cake layers. Next, fill and crumb coat your first cake with turquoise buttercream and for the second cake, fill and crumb coat with pink buttercream. Chill for ten minutes in the freezer, then add a final coat of smooth buttercream.
Now it’s time to make the pink blossoms! Pipe a tiny amount buttercream to the flower nail and place the parchment square on top to adhere. Holding your piping bag at a 90-degree angle, rotate the bag ¼ turn counter-clockwise to begin. Place the tip right against the parchment, squeeze the bag and turn clockwise about half a turn and gently pull up. Keep practicing until you have gotten the feel of it! Any bungled up blossoms can get scraped back into the buttercream bowl for re-use. For the finished blossoms, place a tiny ball sprinkle in the center, then transfer to a tray or plate and chill for 15 minutes until hardened. This will allow you to place the blossoms onto the cake with ease.
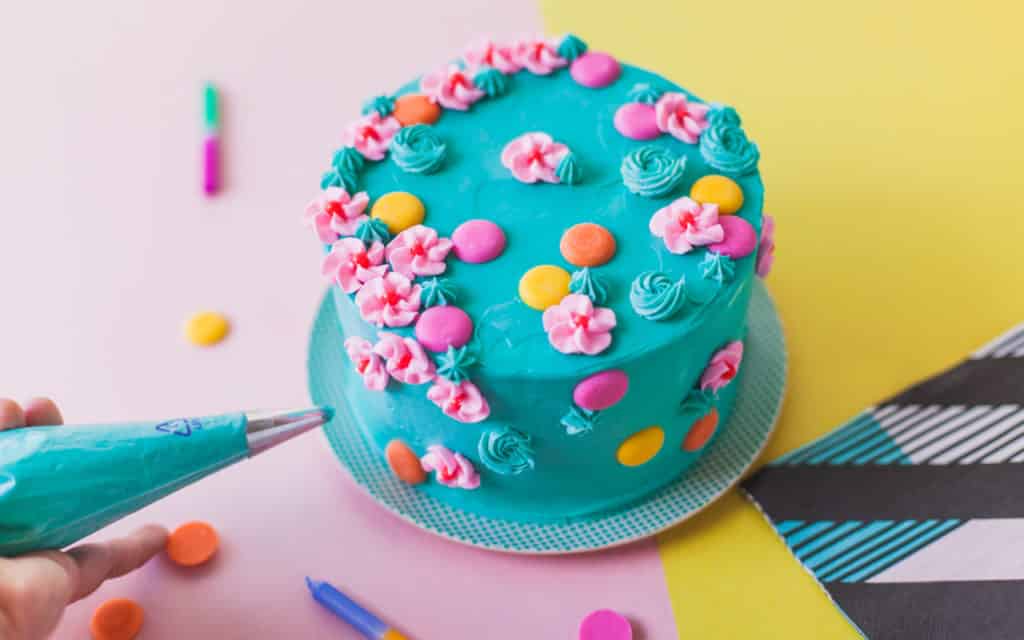
Now it’s design time! Begin placing the blossoms all over the top of the cake, adding Candy Melts candy polka dots, turquoise buttercream drop stars and rosettes as you see fit! Add blossoms, drop stars and polka dots in a more sparing way on the sides of the cake.
Now set your cake aside, you’ve got another one to finish!
Lollipop Splatter Cake
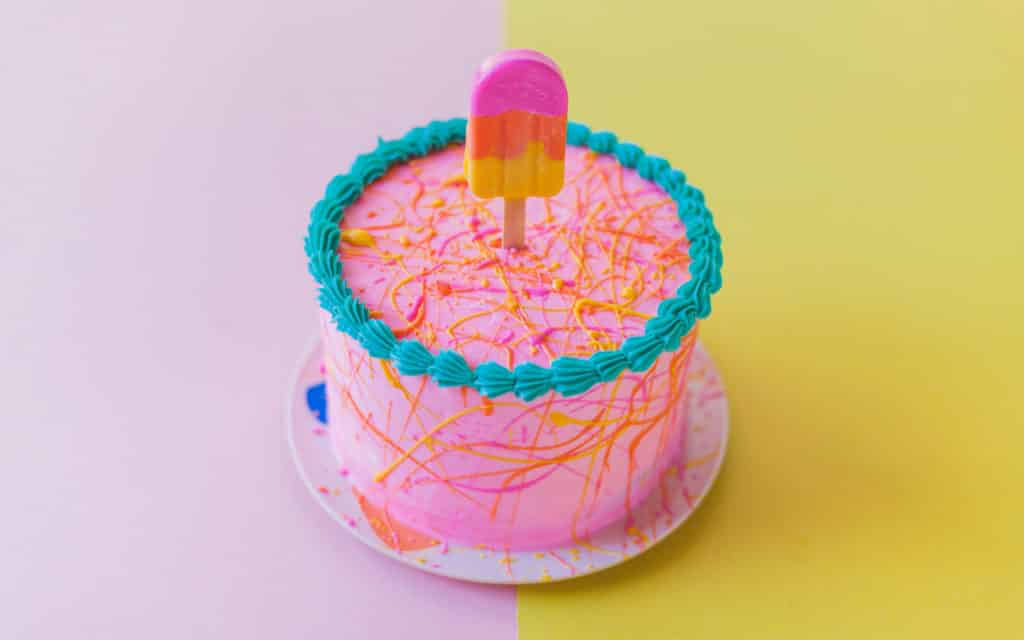
“Splatter time!” I’ve always wanted to try making a splatter cake, and with Candy Melts candy it honestly couldn’t be easier. I used Wilton Counter Covers and cleanup went lickety split fast! You can also use old newspaper to cover your counterspace. Set your pink cake on top of the paper. Melt desired candy colors in individual small bowls according to package instructions – for a splatter consistency, you’ll want to thin out your candy. I used Wilton EZ Thin Dipping Aid to help thin out my candy and it worked great.
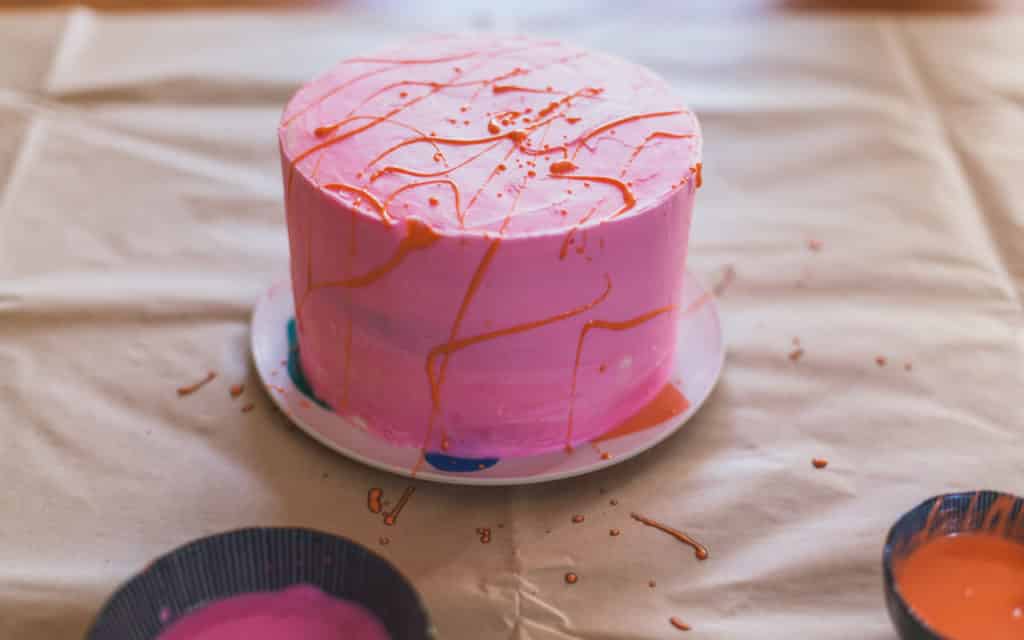
My “paintbrush” for splattering? I actually used a wooden cocktail skewer, so I could just compost it afterward for ease. Don’t forget your apron! Simply dip your skewer into the melted candy and fling it at the cake at close range. You can also hold the skewer above the cake and splatter and drizzle.
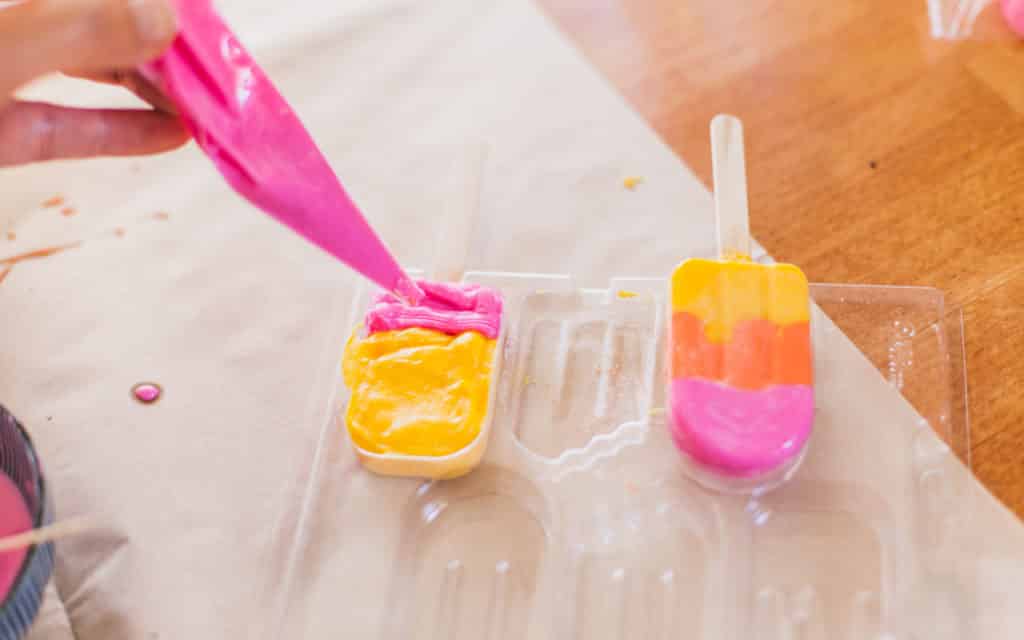
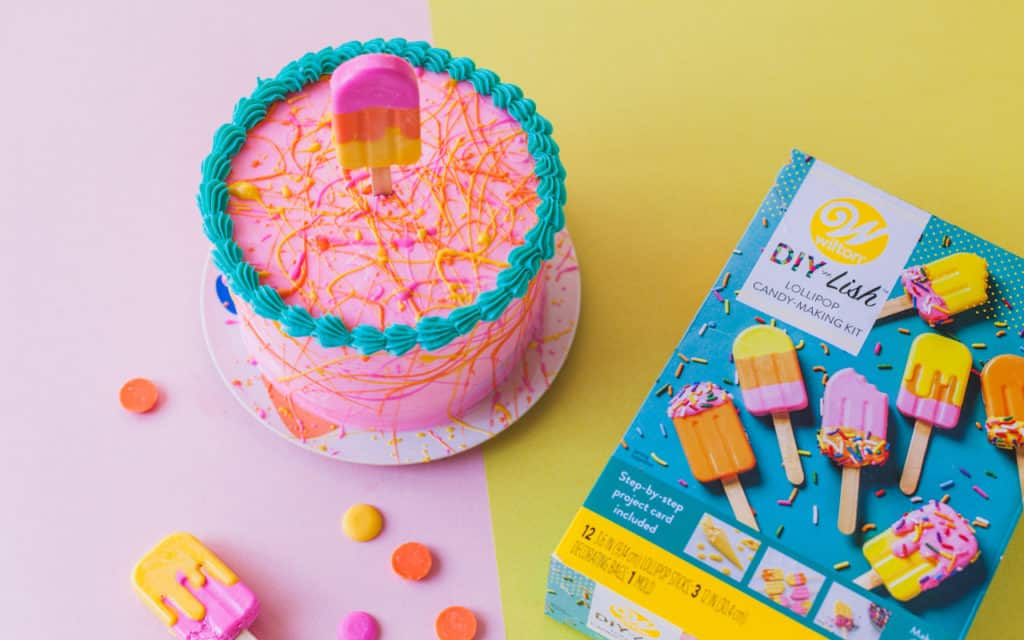
Using the DIY-Lish Lollipop Kit, melt some more Candy Melts candy inside the provided piping bags. Once melted, snip the pointy end off the bag and pipe the contents into the lollipop molds as directed. Once the lollipops have been chilled and set in the fridge, they become the cutest cake toppers for your splatter cake! Finish your splatter cake with a simple turquoise buttercream shell border using the same Wilton 21 piping tip. Carefully place one candy lollipop in the center of your cake. Set your cakes out for your party and get ready for the compliments! This cake duo screams party time, and I think they’ll be a big hit at any birthday party or celebration you might have coming up.
PS, the lollipop kit is lots of fun to make with kids, just make sure you take caution around the candy in the piping bag, as it can be quite warm when first microwaved (speaking from experience)!
Hope you enjoyed this double-the-fun cakes tutorial! You can also find all of my colorful cakes on my Instagram page @cococakeland.


