

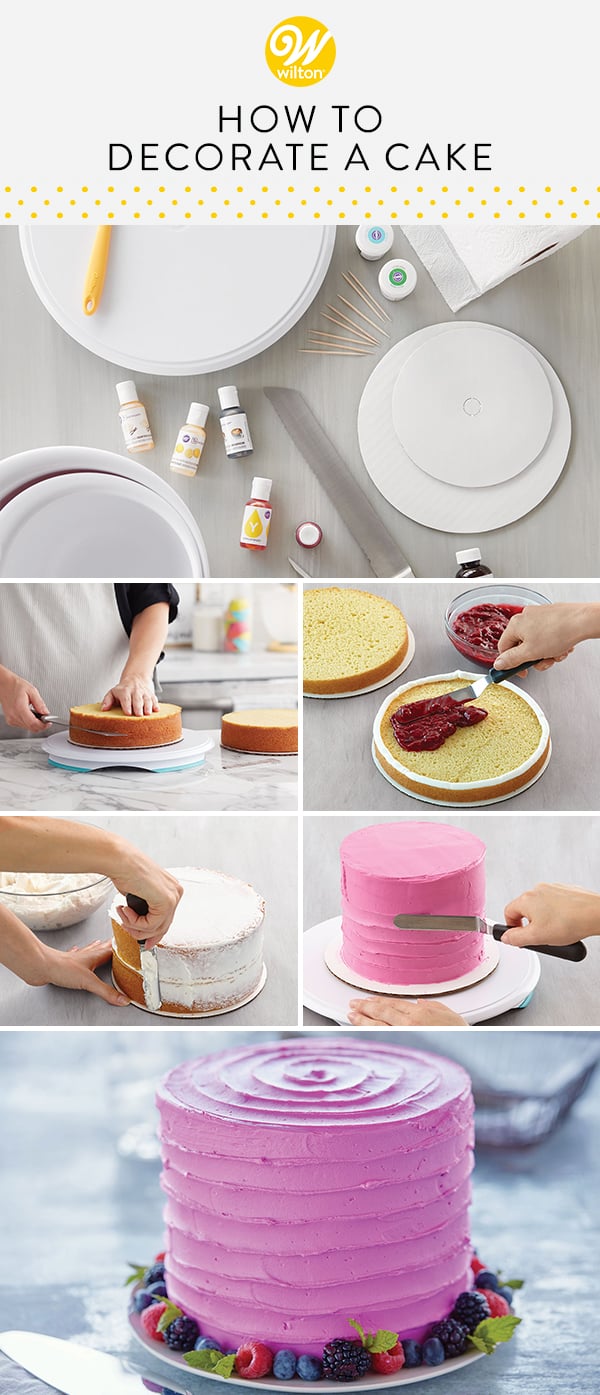
Have you been tasked with baking a cake for an upcoming celebration? Take your homemade cake up a level with this guide on How to Decorate a Cake. From baking the cake to piping the frosting, this guide will take you through the process step-by-step for great results every time!
A Few Baking Tips:
Your cake will be so much easier to decorate if your layers are properly baked. Here are a few tips and tricks to keep in mind as you’re baking:
- Be sure to prepare your pans with non-stick cooking spray before baking your cakes
- Even heat means even baking – so avoid over-crowding the oven
- Allow your cakes to cool completely before decorating
The Tools of the Trade:

The great thing about cake decorating is that you really don’t need a ton of supplies to do it right! Here are five of our favorite go-to decorating tools.
Cake Turntable: A turntable not only allows your cake to rotate, but the non-slip base keeps everything in place as you decorate. This tool is great for icing your cake and piping borders.
Angled Spatula: Available in a variety of sizes, angled spatulas make it easy to spread filling between cake layers and are also great for crumb coating (more on that later).
Icing Smoother (or bench scraper): This tool is a must for getting those clean, smooth finishes to the sides and top of your cake.
Cake Leveler: Level or torte your cakes evenly with a cake leveler. Most levelers have adjustable blades so you can cut your cakes in half or trim off the crown without having to worry about cutting on an angle.
Decorating Bags and Tips: These are not necessary to cake decorating, but they certainly make it more fun! Decorating tips come in a variety of shapes and sizes and are great for adding stars, flowers, borders, lettering and more to your cake.
Leveling, Torting and Stacking
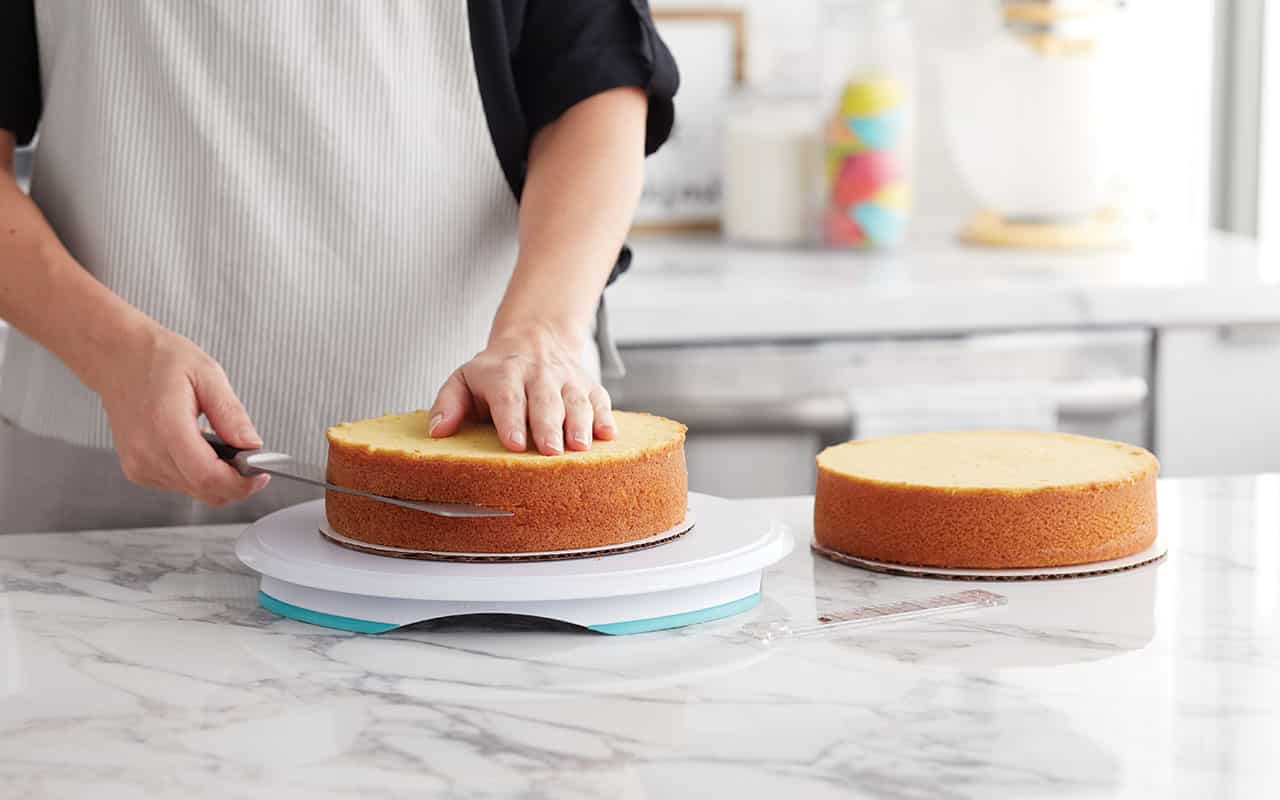
The cakes are baked, the tools are gathered and now we’re ready to start stacking! Whether you’re making a one-layer cake or a cake stacked four layers tall, there are a few things to keep in mind while preparing your cake for decorating.
Leveling
To prevent your cake from toppling over, you’ll want to make sure your cake layers are nice and level. This is done by simply removing the dome, or crown, that forms on top of your cake as it bakes. You can save the crown in the freezer and make cake pops with it later or nibble on it as you decorate (we’ve done both and we prefer nibbling!). You can easily level your cake layers using a cake leveler set to the height of your pan.
Torting
Torting your cake means cutting a cake layer in half lengthwise to form two cake layers. This is often done if your cake layers are thicker than 2 inches. Check out our article on How to Level and Torte a Cake for more information on how to cut your cake with ease.
Stacking
After leveling and torting, it’s time to start stacking! If you’re only doing a single-layer cake, place your cake bottom-side-up on a cake board or cake turntable. The bottom of your cake should be almost perfectly level and have little to no exposed crumbs, so decorating the top of your cake will be much easier.
This holds true for stacked cakes, too. While the majority of your cake layers can be right-side-up, make sure your top cake layer is bottom-side-up for that smooth surface for icing and decorating.
Filling a Cake
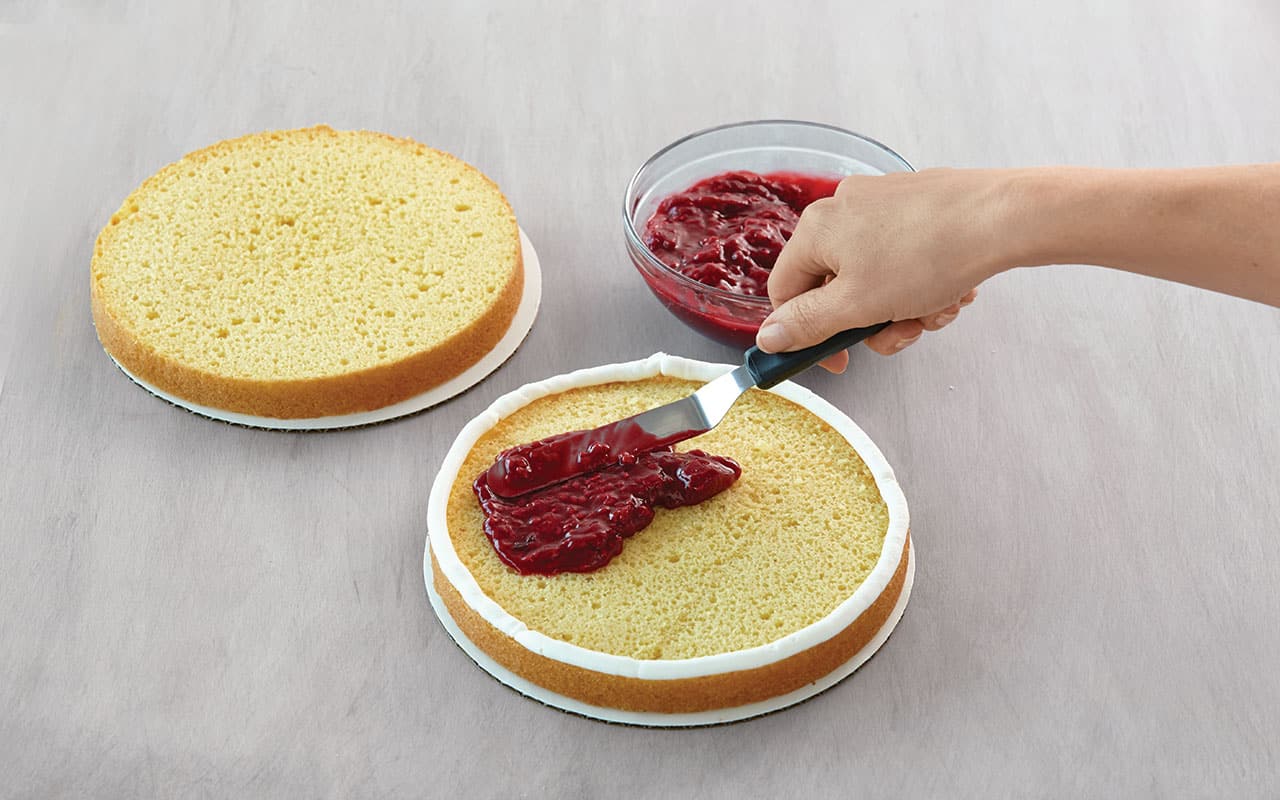
Adding filling between layers not only helps give your cake height, but also adds more flavor and texture to your dessert. Buttercream frosting is a great filling for beginning decorators, but you can also use chocolate ganache, lemon curd, fruit filling or even chopped up cookies or candy!
Buttercream Fillings
Buttercream fillings are a quick and easy way to stack your cakes. They help ensure your cake remains stable and they can help add great flavor and color to your dessert. You can use a decorating bag to pipe buttercream or use your angled spatula to simply spread icing about ½ in. thick between layers.
Fruit, Curd, Pudding and Other Soft Fillings
For wet or soft fillings, like fruit, curd, pudding or pastry cream, we suggest piping a dam around each layer to prevent the filling from seeping out of your cake. To pipe a dam, prepare a decorating bag with a tip 12 and buttercream icing (you can also cut 1 in. off the tip of the bag and avoid using a tip). Pipe a line of buttercream inside the outer edge of your cake layer. Fill the center with whatever filling you desire, using your angled spatula to make sure your filling is level with the top of the dam to create even layers between cakes.
Place the next cake layer on top, pressing down slightly to secure in place. If your cake starts to wobble a bit, you can use plastic dowel rods to prevent layers from sliding.
Crumb Coat Your Cake
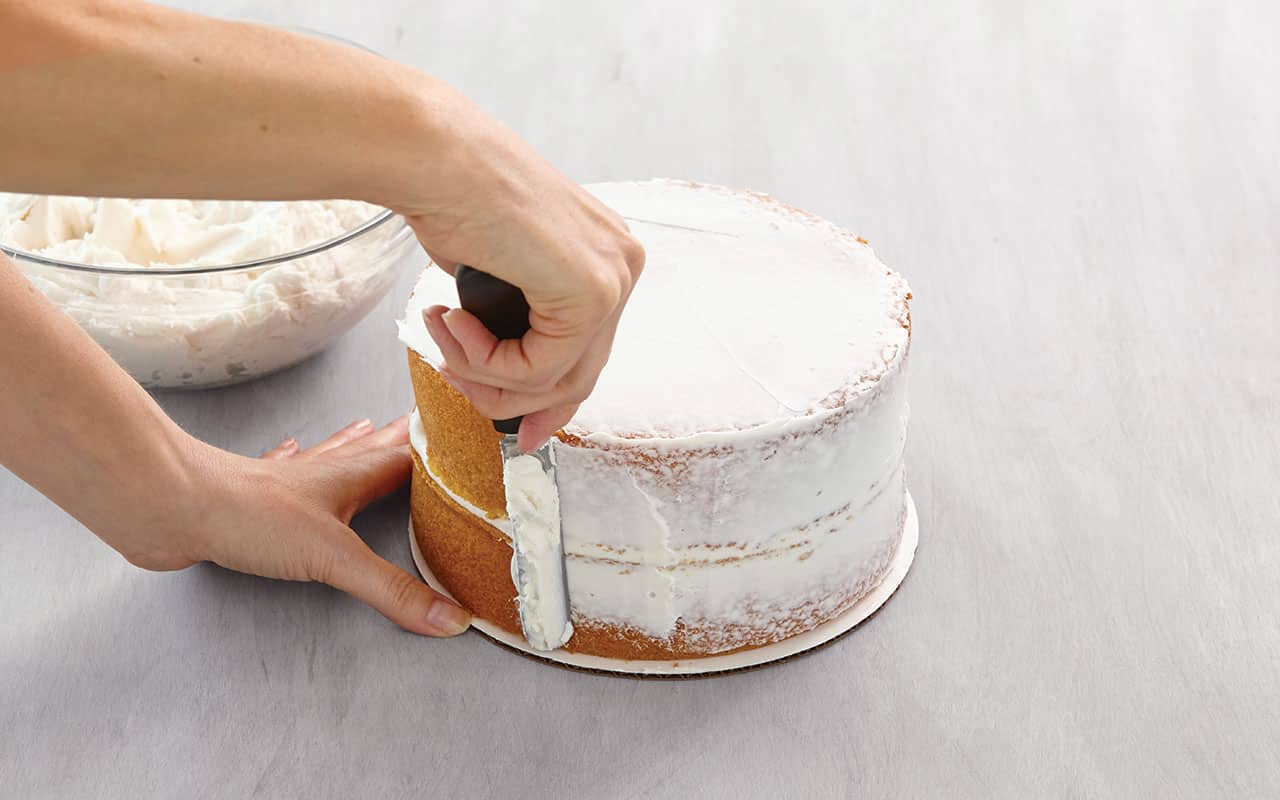
A crumb coat is a very thin layer of icing used to “glue” crumbs down, seal in the cake’s moisture and provide an even base for decorating. This step is often overlooked, but it’s essential to getting that smooth, clean finish!
Check out our article on How to Crumb Coat a Cake for more helpful tips and tricks about this super important step!
Time to Decorate!

Your cake is baked, stacked, filled and crumb coated – now comes the best part: DECORATING!
There are tons of ways you can decorate your cake. You can keep it simple by using a spatula to ice your cake smooth then top it with sprinkles, or you can use a decorating bag and tip to add borders, flowers or a Happy Birthday greeting. Here are a few tips for decorating your cake.
Spatula Ice
Using a spatula to simply ice your cake is one of the easiest ways to put the finishing touch on your dessert. Place your cake on a turntable and use an angled spatula to apply a thick layer of icing to the sides and top of your cake. You can use an icing smoother or the edge of your spatula to get a nice, smooth finish, or leave the spatula marks on your cake for a nice homemade look. If you’re feeling extra festive, add a few sprinkles to top it off!
Here are a few projects to try using this decorating technique:


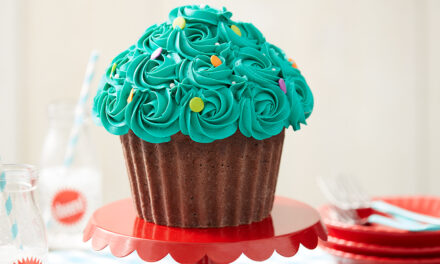
Bag and Tip Decorating
With a few bags and tips, you can create a lovely design on your cake that looks like it was professionally done! There’s no need to master every piping technique, just learning how to pipe a swirl, a star or a rosette will give you plenty of options for decorating your cakes!
Here are a few projects using these simple piping techniques:
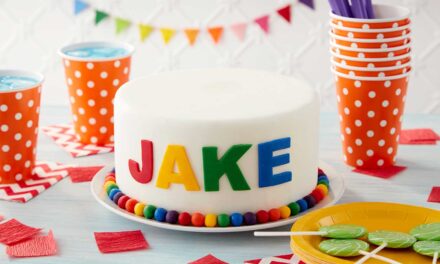
- Pink and Purple Rosette Cake
- Bright and Bold Rosette Cake
- Blooming Number 1 Cake (great for a 1st birthday!)
- Happiest Birthday Cake
- Pearly Pink Cake
- Happy Little Trees Cake (perfect for Christmas)
Borders and Messages
Adding a top or bottom border to your cake is a great way to put the finishing touch on your dessert. Check out our post on 6 Easy Buttercream Cake Borders for some simple ways to finish up your cake.
You can also personalize your cake with a customized message. Piping a greeting on your cake might seem daunting, but it’s actually pretty easy! To make sure you have enough space, try writing out your message on your cake with a toothpick first, that way if you mess up, you can just ice over it!
You can also practice your letter piping on a paper towel or cake board until you’re comfortable with piping it on your cake.
Here are a few simple projects to try with easy lettering ideas:
Taking your cake on the road? This guide on How to Transport a Cake will help your cake arrive safe and sound!
What cake decorating tips can you share with us? Let us know in the comments below! And don’t forget to tag us on Instagram @wiltoncakes so we can see your awesome cake decorations!


Oh… this cake is simply beautiful and sounds so delicious. I’m definitely putting this on my holiday bake list. Thank you so much for sharing yet another one of your fabulous cake creations. I have great confidence in your recipes… you never disappoint!