
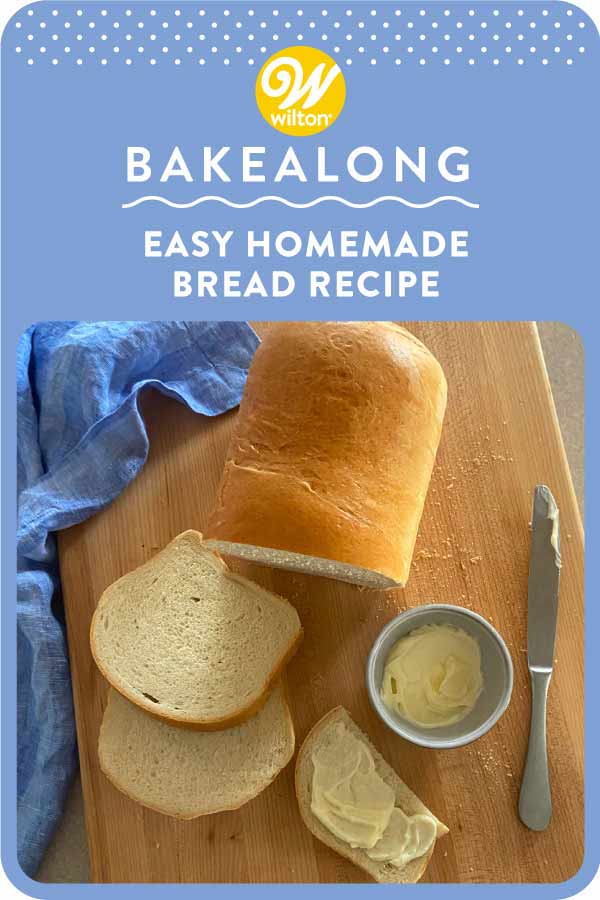
If you want to learn how to make delicious homemade bread from scratch, without using some fancy bread machine, you’ve come to the right place. Going beyond Wilton’s Easy Homemade Bread Recipe this guide includes helpful tips about baking a perfect loaf, as well as creative ways to turn your risen dough into delicious family dinners.
If you’ve ever felt intimidated by bread baking, there’s no need to fear! I’ll show you everything you ‘knead’ to know (pun intended) along with some helpful tricks of the trade. Once you’re through with this guide you’ll be baking delicious homemade bread and filling your home with the feel-good smell of fresh bread in no time!
How to Use Instant Yeast
The magic of making bread from scratch comes from the yeast. Yeast serves as the leavening agent during fermentation.
It consumes sugar, which creates carbon dioxide, allowing the dough to rise. So, yeast is crucial for that light, airy bread we love. Unfortunately, there is no substitute for yeast in this recipe.
There are several different kinds of yeast. This recipe calls for instant yeast, which works much quicker than active dry yeast. However, you can swap active dry yeast for instant yeast if that’s all you have on hand, just know that it will take slightly longer to rise.
How to Make Homemade Bread
This basic bread recipe can be adapted a couple different ways. First, we’ll go through the recipe as a basic loaf.
Ingredients:
- 1 1/3 cup warm water (105°F)
- 1 package (¼ oz.) instant yeast
- 1 tablespoon granulated sugar
- ¼ cup olive oil
- 1½ teaspoons salt
- 4 cups bread flour*, plus more for dusting
- 1 egg, lightly beaten with 1 tablespoon water (optional)
*Bread flour has more protein and creates a chewy texture in your bread. However, if you can’t find it, all-purpose flour works just fine. You may need to add a few extra tablespoons to help the dough come together.
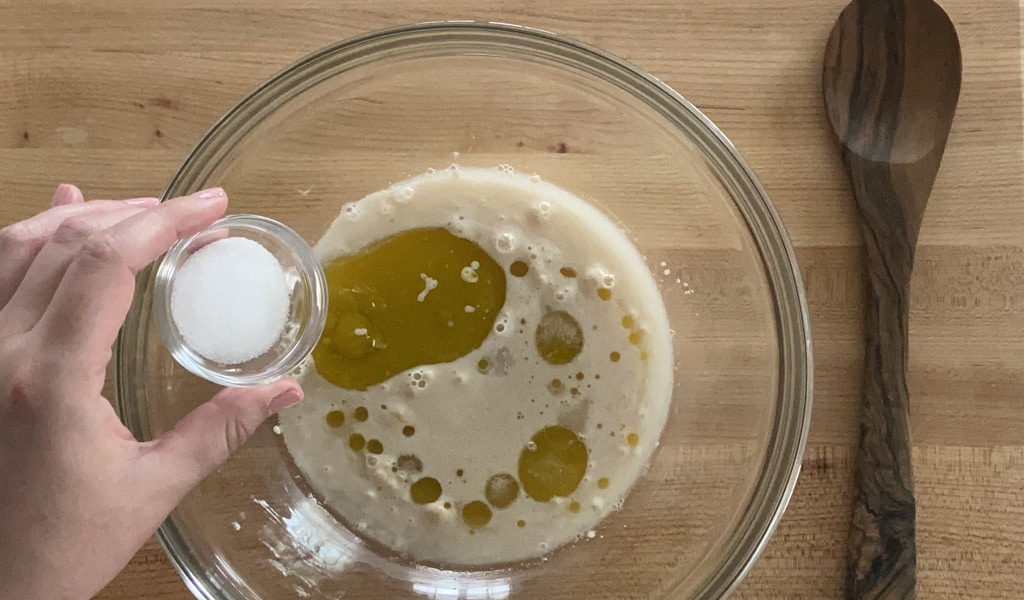
Step 1: In a large bowl, stir together the warm water, yeast and sugar. Let that sit for about 5-10 minutes until it gets foamy, that’s when you know your yeast is working the way it should. You don’t necessarily have to do this with instant yeast, but it never hurts to double check that it’s still “alive” and thriving.
It’s important that your water is exactly 105°F. This is because if it’s too hot, or even too cold, it can kill the yeast and your dough won’t rise properly.

Step 2: Once your yeast and water are foamy, add the olive oil and salt. This dough has quite a bit of oil in it, which makes the bread nice and tender. Olive oil also has a great flavor that lends itself well in each of these bread recipes. If you’d rather not use olive oil, sub it out with another neutral oil, like vegetable, grapeseed or avocado.
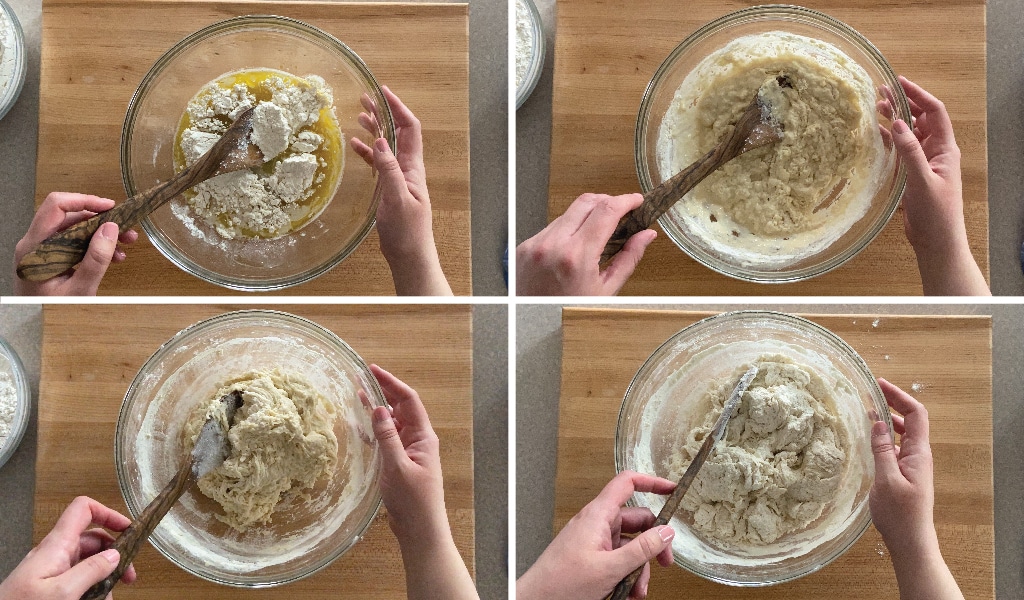
Step 3: Next, you’ll need to get ready for some serious mixing! You can make this dough by hand or with a stand mixer and dough hook attachment. We recommend avoiding using a handheld mixer for this dough, as it will most likely burn out the motor. Preparing your dough by hand does require a little elbow grease, but it’s well worth it!
Gradually stir in the flour, about 1 cup at a time, until a shaggy dough forms. A shaggy dough will still look lumpy and not yet smooth.
Step 4: Turn the shaggy dough out onto a lightly floured surface. Only use enough flour to prevent sticking, otherwise you could end up with a dry dough (remember, you can always add more).
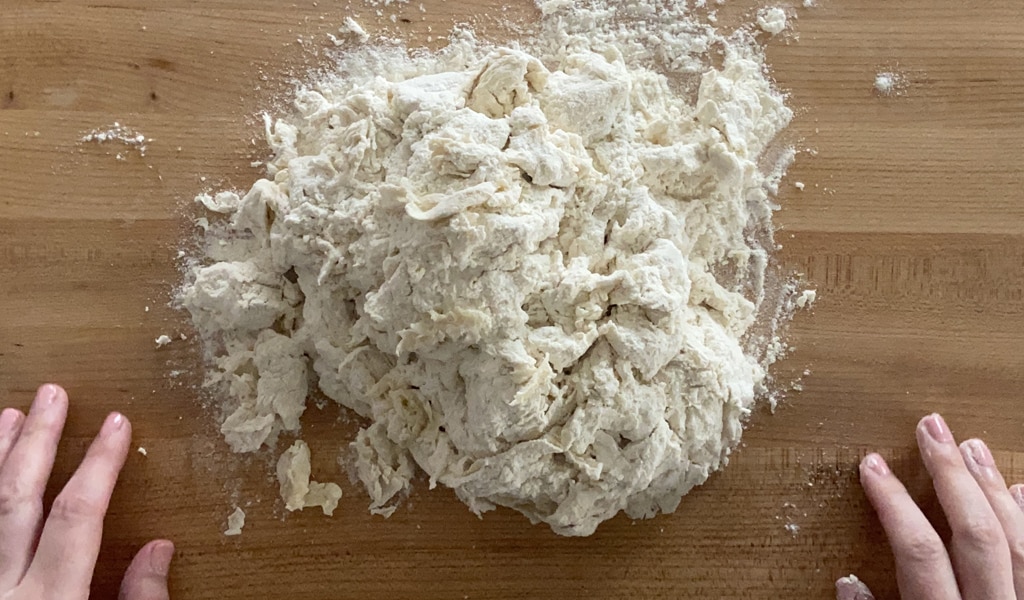
If you feel like it’s already too dry and kneading the dough will be difficult, you can sprinkle a tiny bit of water on it. Just be sure to add no more than a teaspoon at a time.
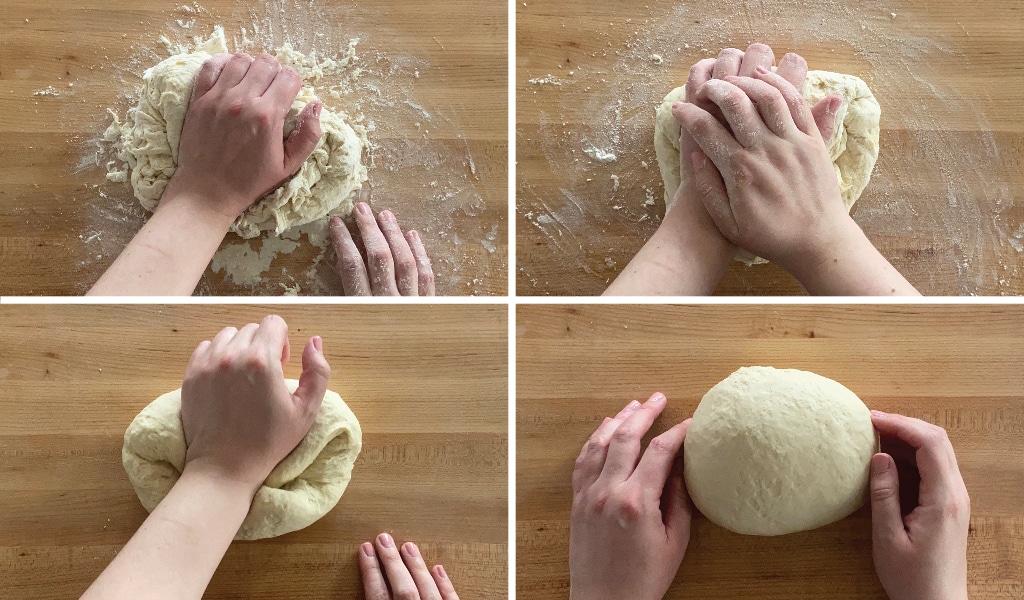
Step 5: Work on kneading bread until it’s smooth and elastic, which is usually about 5-to-10 minutes. Since this particular dough has a fair amount of fat, your dough will be stretchy, but not super elastic. If you’re using the stand mixer with the hook attachment, it will take about 5 minutes on medium speed.
Preparing the Dough for the First Rise
Spray a large bowl with vegetable pan spray or coat with oil. Form the dough into a ball, place it in the greased bowl, and cover with plastic wrap. Place the bowl someplace warm for 30-to-45 minutes or until it’s doubled in size.
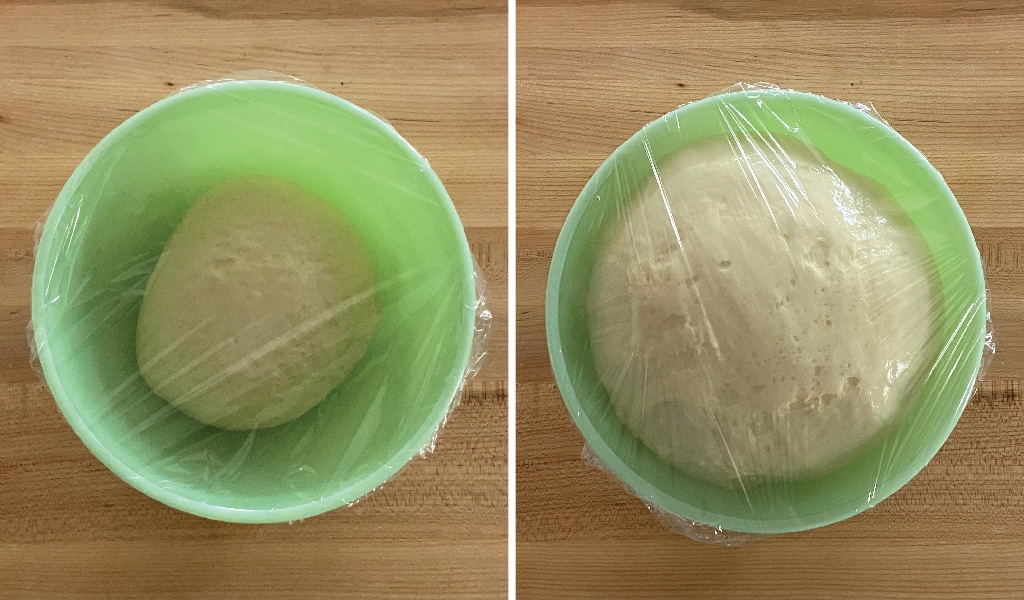
A favorite trick in the test kitchen is to use the microwave. Place a cup of water in a microwave safe bowl or cup, and microwave for about 3 minutes. This gets the inside of the microwave nice and warm and steamy- just the way dough likes it! Place your bowl with the dough inside the microwave and shut the door.
You can also place your dough in the oven to rise, just make sure to remove it before you begin preheating!
Preparing the Dough for the Second Rise
Step 1: Prepare your 9 x 5 in. loaf pan by spraying it with vegetable pan spray or giving it a light coating of oil.
Step 2: Turn the dough out of the bowl and gently punch down. This removes some of the gas that formed while the dough was rising.
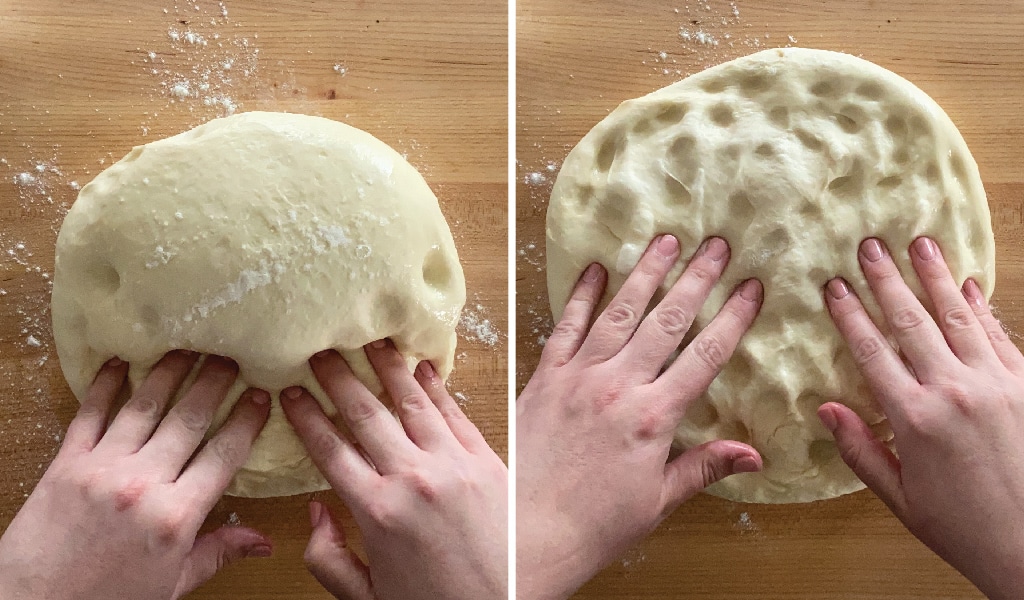
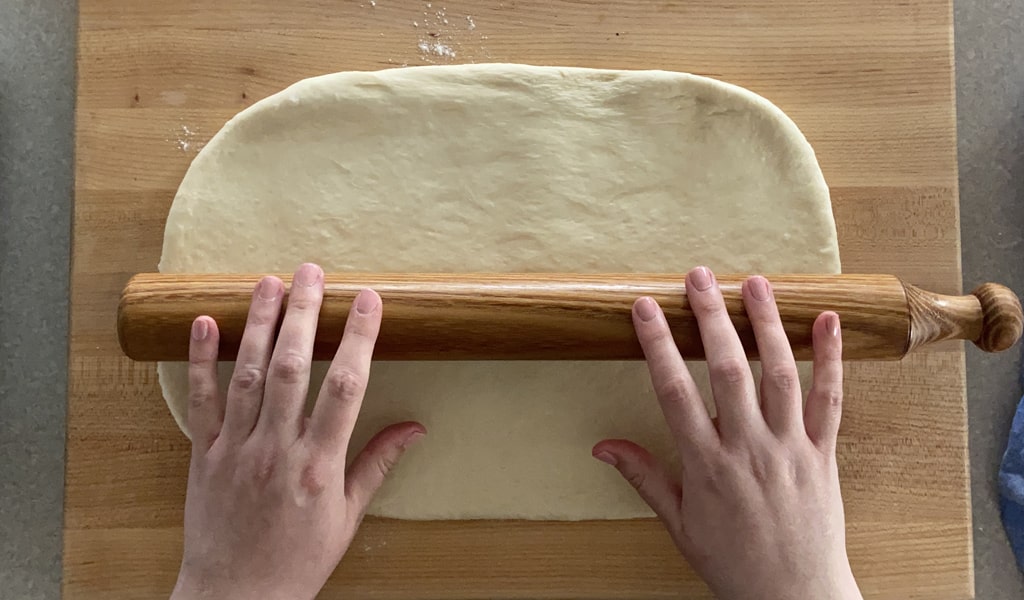
Step 3: Form the dough into a rectangle, about 12 x 8 in. in size. You can either use your hands to pat the dough into this shape or gently use a rolling pin to get it to the right size.
Step 4: Once you have your dough rectangle, fold 3 in. of the short sides toward the middle and roll up the long sides, like you would for cinnamon rolls. Pinch the long seam to seal it together.
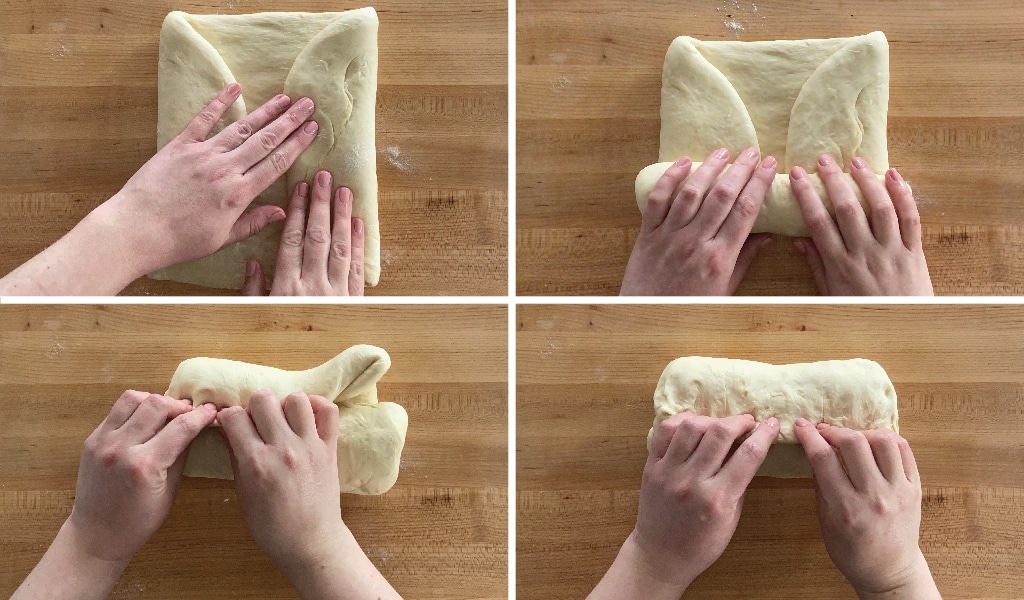
Step 5: Place the dough into the prepared loaf pan- seam side down. Brush with the beaten egg mixture, if using. Using an egg wash will give your bread a nice, beautiful, shiny top. You can also brush the top of the bread with milk, if you prefer, or omit a wash altogether.
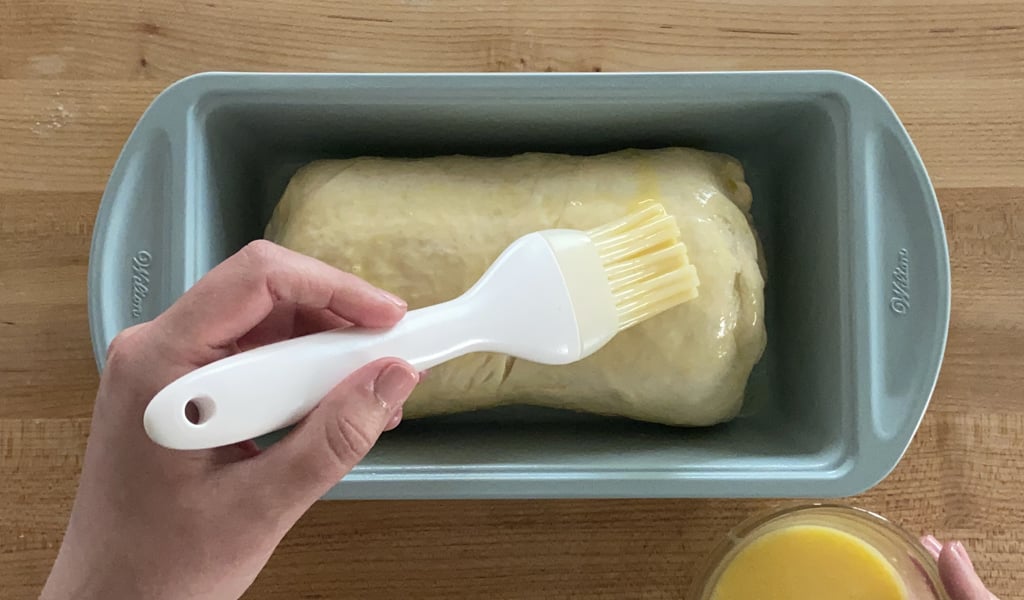
A favorite trick I learned in culinary school is to put a pinch of salt into your beaten egg wash and let it sit for a minute before using. The salt breaks down the proteins in the egg and makes your wash easier to brush.
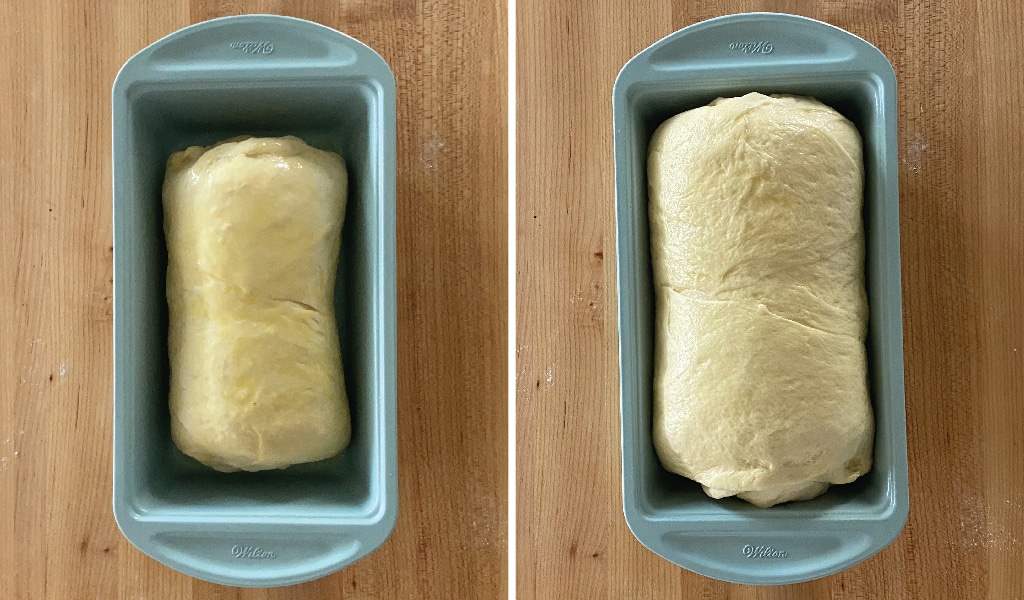
Step 6: Place your bread somewhere warm to rise again, about 35-45 minutes, or until its doubled in size.
Baking the Bread Loaf
Step 1: When you’re ready to bake, preheat your oven to 375 degrees F.
Step 2: Bake your loaf of bread 35-to-38 minutes or until it’s golden brown. Your bread should be done when it’s a deep golden color and sounds hollow when tapped. The top of the crust will feel dry and pretty firm, but it will soften up as it cools.

Step 3: Allow the bread to cool in the pan for 10 minutes, then remove it from the pan and let it cool completely on a cooling grid.
Although it’s tempting, resist the urge to cut into that warm bread. Waiting until the bread is fully cooled will make it easier to cut and will prevent the inside of your loaf from becoming gummy.
Step 4: Once it has cooled, slice away for delicious sandwiches, French toast, grilled cheese, croutons and more!

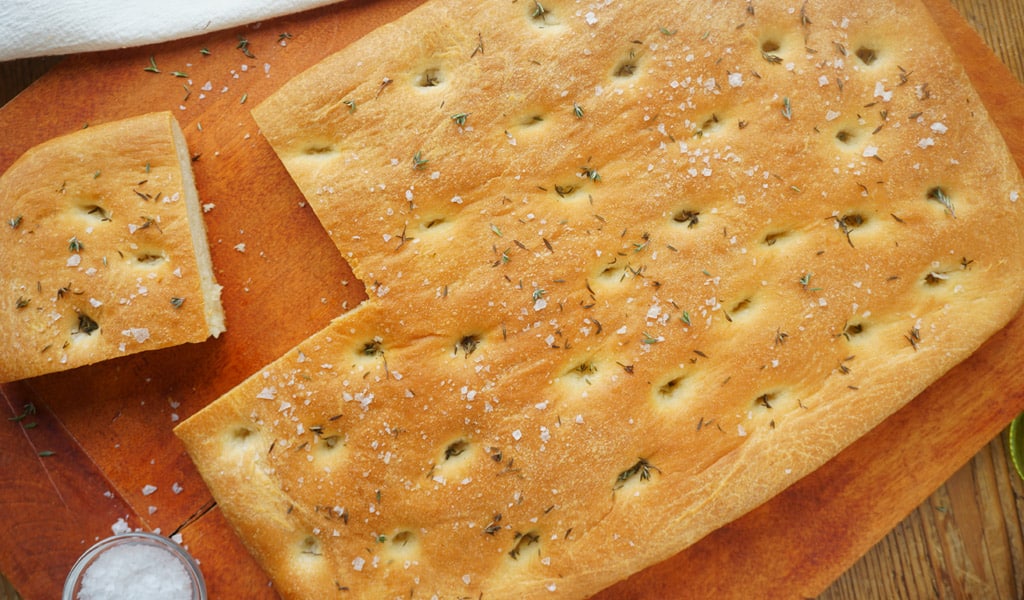
Homemade Focaccia Bread
To make focaccia, prepare the dough just as it’s described above, until you get to the First Rise, then follow these steps:
Step 1: Drizzle 2 tablespoons olive oil onto a 10 x 15 in. rimmed baking sheet. On a lightly floured surface, roll the dough out into a rectangle shape measuring 10 x 15 in. and place it on your prepared pan.
Step 2: Drizzle with 1-2 tablespoons olive oil and let rise 45-to-60 minutes, or until doubled in size.
Step 3: Preheat your oven to 425 degrees F. Then, drizzle another tablespoon or so of olive oil onto the bread and sprinkle on your desired toppings. You could use sea salt, freshly ground black pepper, Italian seasoning, or even some thinly sliced onions or minced garlic. Then, using your fingers, dimple the top of the bread.
Step 4: Bake 25-to-30 minutes or until it’s achieved a rich golden-brown color.
Step 5: Remove from oven, let cool slightly, and enjoy!
Homemade Pizza Dough
For homemade pizza dough, , prepare the dough just as it’s described above, until you get to the First Rise, then follow these steps:
Step 1: Preheat your oven to 450 degrees F. Divide your dough in half (this recipe will make 2 pizzas out of this dough). Form each piece of dough into a ball and let stand 15 minutes to relax. You can freeze the second dough ball if you don’t want to use it right away. To do this, wrap the dough ball tightly and freeze for up to a month, just let it thaw in the fridge and bring back to room temperature before using it.
Step 2: Roll dough into a 14 in. circle. Brush a pizza pan with 1 tablespoon olive oil and transfer your rolled-out dough to the pan. Prick the dough all over with a fork and brush with another tablespoon of olive oil.
Step 3:Bake for 10 minutes, or until lightly golden brown.
Step 4: Remove from the oven and carefully add your desired sauce and topping.
Step 5: Bake for 10-to-15 minutes longer or until the cheese is melted and crust edges are browned.

How to Use Up Leftover Bread
Have you been perfecting your bread baking skills and have more than you can possibly eat? Here are some ideas to use up all that spare bread!
Croutons: Cut the bread into bite-sized pieces, toss with olive oil (or melted butter), salt and dried herbs. Spread into a single layer on a baking sheet and bake at 375 degrees F for about 10 minutes.
Breadcrumbs: Put bread slices on a baking sheet in the oven at 375 degrees F to toast on both sides. Once they’re golden, let them cool and dry out for a few hours. Crush them into a fine grain with a food processor and store in an air-tight container.
Panzanella Salad: This Italian salad is typically prepared by mixing stale bread cubes, tomatoes and onion with your favorite Italian dressing.
Texas Toast: Slice leftover bread into thick slices. Melt some butter and add your favorite seasonings and minced garlic. Spread the butter mixture onto your bread and place on a baking sheet. Bake at 375 degrees F until it gets toasty and delicious!
French Toast: Cut thick slices of bread, then dip both sides in an egg wash and fry in a pan. Top with fresh fruit and whipped cream, melted chocolate and nuts, or keep it simple with butter and maple syrup… YUM!
Strata: Similar to quiche or frittata, cubed bread is added to the egg mixture, along with some other delicious ingredients you can customize to your taste.
Bread Pudding: Bread pudding can be made either sweet or savory and gives your bread a second delectable life!
How to Freeze Homemade Bread
If you can’t get through an entire loaf and want to save it for later, just wrap it up nice and snug and stick it in the freezer. You can thaw it right on the counter or slice and toast it from frozen. It should stay delicious in the freezer for a few months.
Have you tried making yeast bread at home? Share a picture of your creations on social media and tag us @wiltoncakes so we can see them!
Looking for more delicious bread recipes? Check these out:


Just got my Wilton long loaf pans(12 x 4.5) and decided to try this recipe. I used AP flour and my bread machine for the initial mixing, but followed rest of instructions for the rise and baking. The bread came out wonderful. Light and fluffy on the inside, nice crust on the outside. Very tasty as well. Very happy with my new pans and will make this loaf again and again.
So happy this turned out for you!
with your bread recipes do you have to use bread flour?
Hi Bella, While we recommend using the flour noted in the recipe you can use all purpose flour with the caveat that the result may not be the same. While all purpose flour can be used we recommend using a few additional tablespoons of all purpose flour to help the dough come together.
It would be a nice thing to plan it so people could print the recipe. Many of us do not have a computer in the kitchen. Also we don’t want to use all the paper it would take to print the whole article. Thank you.
I need a good gluten free bread recipe,
Hi Barbara- As of now the Test Kitchen does not have a gluten free bread recipe. However, this is something that can be taken back for review. Thank you!
4 cups of flour seems a lot to make one (1) loaf of bread
Hi Rosemary, the 4 cups were used due to the this being a bigger loaf of bread. Due to the loaf size we used 4 cups of flour.
The wrong yeast is listed on the ingredient and direction list. Instant yeast is to be added to dry ingredients first, then liquids added second. Active dry is proofed in lukewarm water until it blooms, then dry ingredients added. Long story short, active fry yeast needs to be on the ingredients list.
Hi Trina- Instant yeast was used in this recipe. It’s true that instant yeast is usually added directly into the flour. However, the Test Kitchen included the softening in water step so that anyone despite baking skill level can use this recipe and be able to check if the yeast is active. This recipe can be used with active dry yeast, though as noted, the bread will not rise as quickly.
Why don’t you make 4×6 loaf pans?
Hello – While we do not have a 4 x 6 loaf pan we do have a 3×5.75 loaf pan and 3 X 5.75 on our site. If you would like to look these pans up on wilton.com the item numbers to search are item # 2105-1425 for the 3×5.75 loaf pan and 2105-949 or 2105-989 for the 3 X 5.75 pan.