
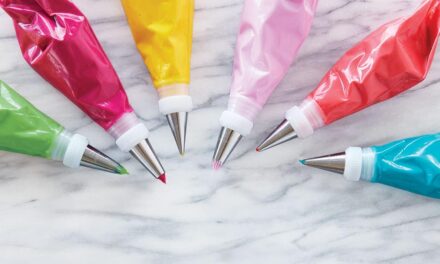
Round piping tips come in a variety of sizes and can be used to pipe dots, beads, lettering, string work and swirls. Learn how to decorate cakes, cupcakes, cookies and more using round piping tips.

Though it may seem intimidating, once you understand how bags and tips work, you’ll realize how easy it is to pipe amazing decorations on your treats. The good news is that most of these tips do all the work for you, so all you need to do is fill your bag and get to piping!
How to Pipe Dots
Perfect for classic borders, figure piping and adding accents to flowers, dots are a versatile technique that can be piped with any round tip.
This simple decorating technique is quick and easy to learn and looks great as a uniform border or when clustered with dots of various sizes.
Give your cupcakes a dot of color with these Darling Dot Cupcakes. You can use a variety of round tips to pipe a border of dots around your cupcake, or just decorate one side for an eye-catching design.
For a simpler look, use one tip size to create a uniform border. This Rainbow Fault Line Cake, for example, uses tip 12 to create a rainbow of color along the top and bottom edge of the cake.
Dots can also be used to give your treat a fancy finishing touch, like in these Spot of Sweetness Brownies. This project uses a small tip 2 to top off iced brownies with a white polka dot pattern. You can also use small dots to pipe flower centers on apple blossoms and drop flowers, like in this Cascading Drop Flower Cake.
You can also use larger round tips to pipe clusters of dots, creating soft and fluffy buttercream clouds. These Rainbow Candy Curl Cupcakes, for example, are great for any magical birthday celebration. And sweet dreams are certainly made of this Star-Studded Smash Cake, great for first birthdays or baby showers.

How to Pipe Pulled Dots
A pulled dot is a simple, yet effective technique. Great for creating flowers, borders and more, a pulled dot involves piping a large dot, then using the tip of a spoon or a spatula to pull out one edge of the dot.
Use this technique with a tip 12 to pipe a flower on a cupcake, or cover your whole cake with a textured border using a larger tip 2A. This Pulled Dot Cake uses alternating colors to create an amazing pattern.

How to Pipe Pull-Out Dots
Pull-out dots are similar to the classic dot, but rather than giving your dot a rounded finish, the bag is slowly pulled up and away, creating a tear drop shape.
This technique is best used with larger round tips, such as tip 6 through tip 12, but you can also use smaller round tips with this technique to pipe grass, carrot tops, leaves or cactus needles, like on this adorable cactus cake.
This Lemon Poppy Seed Cake uses a large tip 2A to pipe a border of pull-out dots for added texture and dimension. These stunning Succulent Cookies use the pull-out dot, combined with the spatula striping technique, to create life-like blooming florals.

How to Pipe Beads
Slightly more elongated than a dot, beads are often used in figure piping or to create borders and accents on your cake.
Use tip 4 or 5 to pipe floral clusters of beads, like in this Polka Dot Flower Cake, or combine beads and dots to pipe a lovely lace design, like on this 2-Tier Any Occasion Cake.
The bead technique is also the basis for piping hearts (just two beads side by side). Tip 2 can be used to pipe small heart-shaped seeds on these One in a Melon Cookies, or, for a more realistic look, pipe 1-beaded seeds.

How to Pipe a Cupcake Swirl
Give your cupcakes that iconic bakery look using a tip 2A swirl. This technique is great for beginners and is even better when topped off with sprinkles!
Looking to create a buzz with your baked goods? Use tip 2A and yellow frosting to pipe a little bee hive on a chocolate cupcake, then top it off with a little fondant bee. Or, for a quicker alternative, try our adorable bumble bee icing decorations.

How to Pipe Letters
Round tips are perhaps most widely known for writing and printing. For best results, use smaller tips on smaller projects (like cookies and cupcakes) and larger tips on larger projects (like cakes or bigger desserts).
To make sure you have enough space for your message, try practicing your piping on a piece of waxed paper or cake board first. You can also outline your message with a toothpick, then trace over it with icing.
These Sweet Message Sandwich Cookies are a fun way to surprise the kids with an after-school snack, or make your favorite cookie lover a birthday treat they’ll never forget with this Happy Birthday Cookie Cake.
If there’s enough room on your cake for a larger message, you can also use our Letter and Numbers Fondant Cutter Set to lightly imprint your message, then pipe over the lines with a larger round tip (this is one of our favorite hacks!).

How to Pipe Lines and Drop Strings
Not only are round tips great for outlining cookies with royal icing, they’re also used for piping fine lines and details on your desserts.
This Pretty Peacock Cake is almost completely made using a variety of round tips. Use them as you would a marker or colored pencil to outline and fill in your design.
You can also use round tips to pipe scrolls and lattice, like this amazing henna-inspired cake. When piping intricate designs like these, it’s a good idea to have several round tips of the same size so you don’t have to clean tips between use.
You can also prepare decorating bags with couplers so it’s easy to switch between tips as you work.
Round tips can also create a woven effect when used with the basketweave technique. These Garden Shape Cookies use round tips of various sizes to create lovely and colorful knit-like patterns.
Not all lines need to be small and thin! You can also use larger round tips to pipe thicker lines, like on this Cool Blooms Giant Cupcake Cake. Whether you’re looking to add fat or thin lines to your treat, there’s a round tip to help you get the job done!
Drop strings are an elegant way to add borders to your desserts. This technique, often done with tips 1, 2 or 3, involves touching the tip to the side of the cake to attach the icing, then slowly moving the tip away from the cake, allowing the icing to come out in a string.
The tip is then brought back to the cake, creating a curved line. With this technique, patience and practice is key!

How to Pipe Embroidery and Lace
Pipe super fine lines close together using tip 1 to give the impression of an embroidered design (tip 2 can be used on larger cakes and desserts). This technique may require some patience, but the finished product is well worth it!
These Spring Flower Cookies use tip 1 to create amazing floral designs using royal icing and this Charming Leaf Cake combines simple lines with vibrant icing colors to create a lovely embroidered leaf pattern, perfect for any fall holiday.

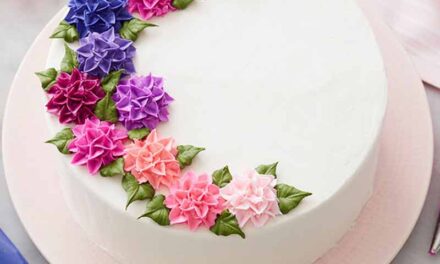
Similar to a pulled dot, you can use a decorating brush to pull your outlined design towards the center, creating brush embroidery. This technique works well on piped flowers, such as these Hydrangea Mini Cakes or these Fancy Floral Cookies.
The Cornelli Lace technique is another way to create a lacy design on your dessert. Using a small tip 1 or 2, this free-form technique involves piping continuous curving lines that do not touch or overlap.
Often found on formal wedding cakes, this technique can be used sparingly or to cover a whole cake, like this Red Hot Red Velvet Cake.
And don’t forget to check out the other posts in our tip series for even more decorating inspiration!


Thanks for sharing the tips! The article is really complete!
Thank you Andrea!
I loved learning about how to make flowers and leaves and am excited to do it!
What I was NOT excited about was the political ad asking for donations. It was
AWFUL!!!!!!
videos would be more helpful in the long run. just wording does not help the person just starting out.