
Great for melting, drizzling, dunking and dipping, Candy Melts candy comes in a wide selection of colors and flavors.

From how to melt Candy Melts candy to troubleshooting tips and tricks, this is the comprehensive guide on how to use Candy Melts for baking and decorating
What is Candy Melts Candy?
Often known for covering cake pops, Candy Melts candy is a sweet confectionary coating that can be used to dip treats, mold candy, pipe and drizzle decorations and even make ganache. It’s available in a variety of colors and flavors, can be melted to a semi-liquid state and sets hard with a smooth and shiny finish.
Besides the traditional uses, Candy Melts can also be used to make ganache and fudge. You can pipe it or thin it out to a pouring consistency. Colors can be mixed to form new shades and leftover candy can be re-melted and used again! From simple dipped pretzel sticks to rainbow candy curls, Candy Melts candy can help you do it all!
Candy Melts vs. Chocolate
Though Candy Melts have a similar look, taste and texture to chocolate, they are quite different. Melting chocolate requires a process called tempering, which gives chocolate that nice, shiny finish. Tempering involves temperature precision and a candy thermometer to do it properly.
Candy Melts, on the other hand, do not require tempering, making them easier to use for everyone, especially beginners! Unlike chocolate, Candy Melts will also hold their shape at room temperature, so you don’t have to worry about your candy melting if left out.
How to Melt Candy Melts Candy
Candy Melts can be melted one of three ways: in the microwave, using a double boiler or in the Candy Melts Melting Pot.
Microwave: The microwave is the quickest way to melt your Candy Melts. It’s also the preferred method if you’re melting smaller amounts of candy.
To melt in the microwave, place your candy in a microwave-safe container or disposable decorating bag and microwave at 50% power or defrost setting for 1 minute. Stir thoroughly in container or knead bag. Return to the microwave, stirring or kneading at 30-second intervals until candy is mostly melted.
Let your melted candy stand in the microwave for 30 to 60 seconds before removing. This lets the residual heat from the bowl or bag melt any remaining candy. Continue stirring or kneading to better distribute any residual heat. When candy is nice and smooth, it’s ready to use.
Double Boiler: The double boiler method uses steam to melt your candy and is great if you’re planning to melt large amounts.
To melt using a double boiler, fill a small pot with about 1 in. of water. Place a large heat-safe bowl on the pot and place the pot on low heat. Add your Candy Melts candy to the heat-safe bowl, stirring constantly to help distribute heat. The steam from the boiling water will help melt your candy.
If too much steam is releasing from the saucepan, turn down your heat. Water and steam can cause your Candy Melts to seize, rendering them unusable.
Once almost completely melted, remove the bowl from the heat and continue stirring until nice and smooth.
Candy Melts Melting Pot: Perhaps the safest way to melt your candy is with the Candy Melts Melting Pot. This pot can melt up to 2½ cups of Candy Melts in less than 10 minutes and will keep your candy warm until your project is completed. It’s great for any project that requires dipping, such as cake pops or pretzels. The silicone pot is also easy to clean!

How to Make Candy Melts Candy Thinner
If your melted candy appears too thick or is not smoothly covering your treat, you can thin it out using EZ Thin Dipping Aid. These crystals dissolve into your melted candy, making it the perfect consistency for dipping and drizzling.
To use EZ Thin, simply add 2 tablespoons of crystals to 12 oz. melted candy. Stir until completely incorporated. If you’re using less than 12 oz. of melted candy, start with a small amount of EZ Thin, then continue adding until you achieve the correct consistency.
You can also thin out your melted candy with solid vegetable shortening (2 tablespoons per 12 oz. bag). Do not use liquid vegetable oil, butter, milk, water or any other liquid to thin your candy. These will all cause your candy to break or seize, rendering it unusable. This can also happen if your candy is burned or overheated.
Whether it’s thinned with EZ Thin or vegetable shortening, Candy Melts will still harden and retain its sheen.
For more information on how to melt and thin your candy, check out our blog post, “How to Melt Candy Melts Candy”.
How Long Do Candy Melts Take to Harden?
Depending on the project, candy can take anywhere from 5 to 60 minutes to harden completely. Smaller items, like cake pops, dipped pretzels or drizzled popcorn, can harden in roughly 10 to 20 minutes in the refrigerator.
Larger candy projects, like bark or cake toppers, could take a little longer, probably closer to 45 minutes.
What Do Candy Melts Candy Taste Like?
Traditional Candy Melts candy is vanilla flavored; however, you can also find them in dark cocoa and light cocoa, as well as a variety of limited edition flavors.
If you want to add your own flavoring, make sure your extract is oil-based. Anything that’s not oil-based may ruin your melted candy.
How to Color Candy Melts Candy
Candy Melts come in a wide selection of colors, but if you can’t find the color you need, you can create your own custom shades using our Primary or Garden Candy Color Sets. These candy colors are similar to icing colors, but are specially designed to work with Candy Melts.
We suggest not using icing colors or Color Right food coloring to color your candy, as these are not oil-based and may ruin your candy.
You can also mix different colors of Candy Melts candy together to achieve a whole slew of colors! Check out our Candy Coloring Chart for a variety of custom shades.

What Are Candy Melts Used For?
From dipping cake pops to molding your own candies, Candy Melts can be used in all kinds of ways.
Candy Melts for Cake Pops
Perhaps the most common use for Candy Melts is to coat cake pops. The candy helps seal in the flavor and moisture of the pop and also acts as a blank canvas for decorating!
To coat cake pops, we suggest using a Candy Melting Pot, then thinning your candy with EZ Thin. This will help ensure your candy stays at the right consistency from the first pop to the last.
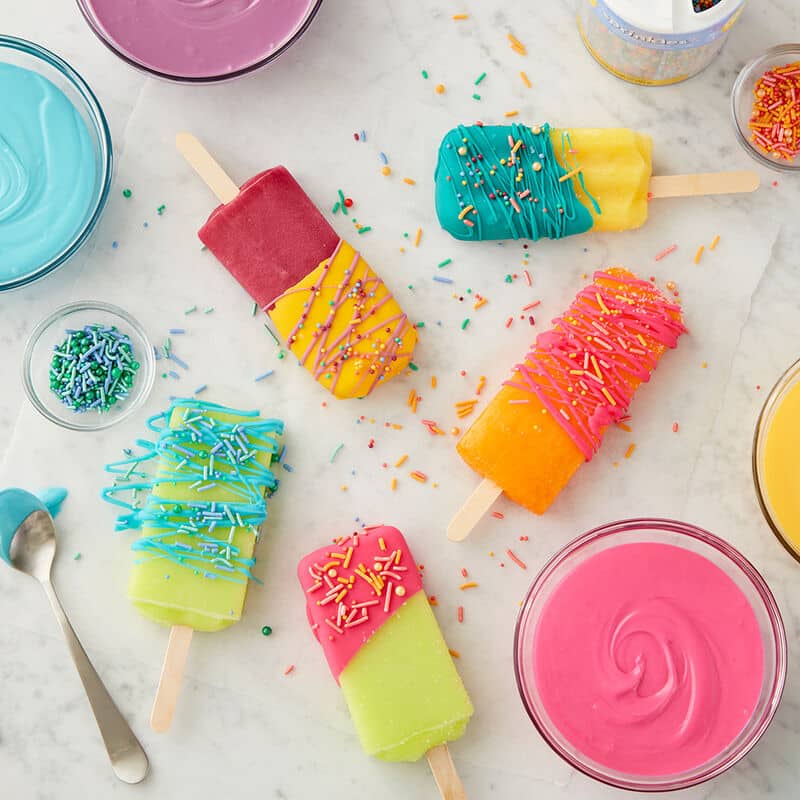
Dipping and Drizzling
Everything is better with a candy coating! From apple slices to potato chips, you can have fun dipping all your favorite foods into your favorite Candy Melts candy colors.
For a quick decorating technique, use our Candy Melts Drizzle Pouches, which can be melted and drizzled right from the bag, to decorate pretzels, popcorn and more.
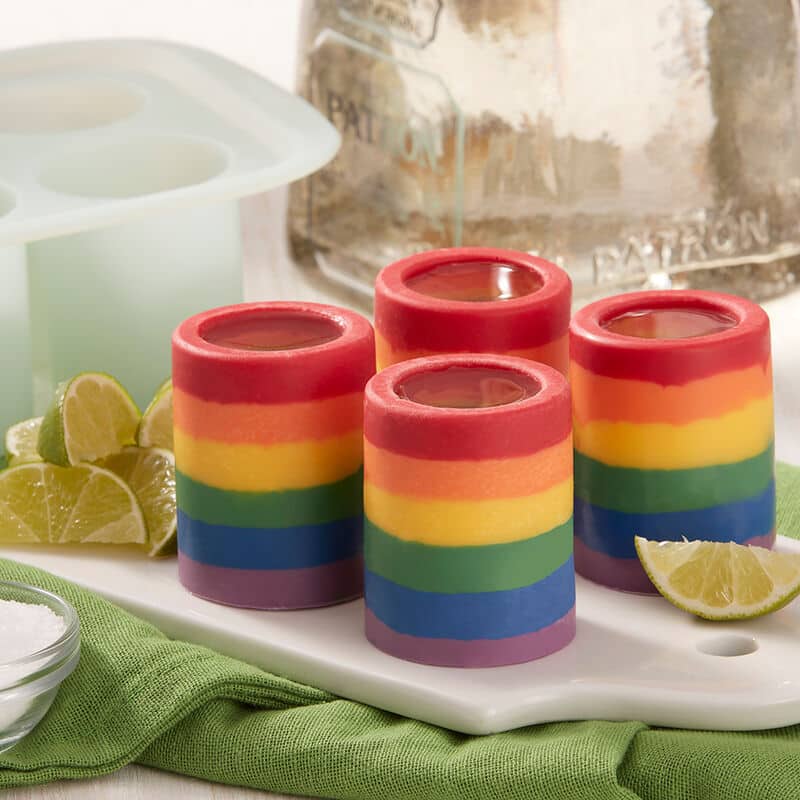
Molding
Candy Melts can also be molded into a variety of shapes and designs using plastic and silicone candy molds. For best results, we suggest melting your candy in a disposable decorating bag, then piping it directly into the mold.
Molded candies can be used to top cakes and cupcakes, or just enjoyed on their own! You can even fill them with candies, nuts, chocolate or peanut butter.
Marbling
The marble effect looks great on everything from cake pops to donuts. All you need is one main color (often Bright White) and a few highlighting colors (Drizzle Pouches are great for this).
To make marbleized treats, simply melt all your candy, separately, according to package instructions. Drizzle your highlighting colors over the main color, then use a toothpick to lightly swirl the colors together. Dip your treats in the swirled candy for a unique effect!
Pouring
For quick and easy decorating, turn your favorite color of Candy Melts candy into a pourable ganache or mirror glaze. By combining your candy with heavy cream or condensed milk, you can quickly cover cakes, petit fours, cookies and more with a sweet and colorful topping.
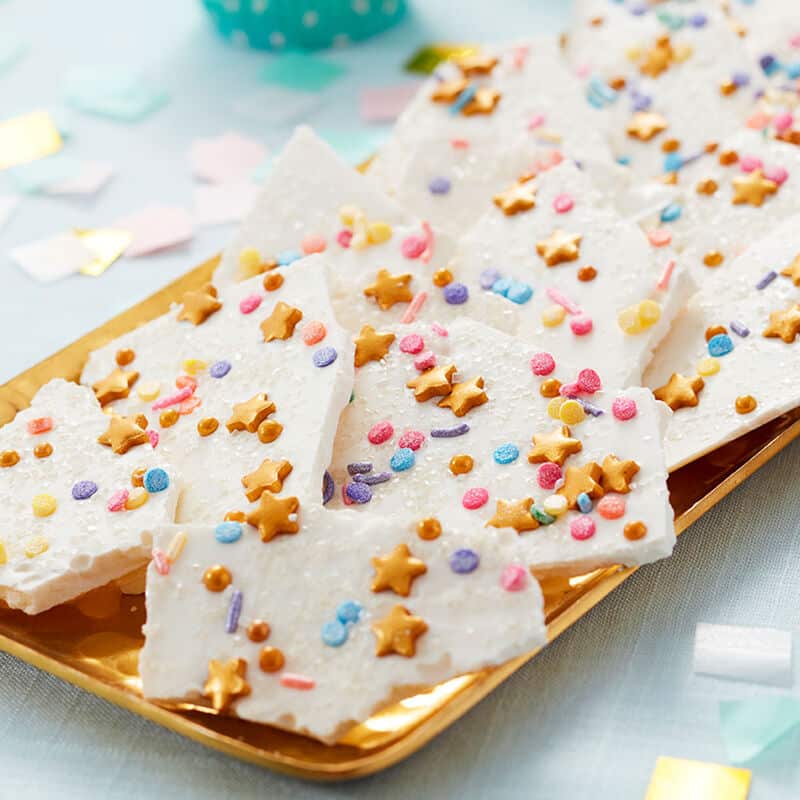
Candy Bark
Candy bark is a great candy project for beginners. It’s easy to customize with your favorite colors and toppings and makes a great handmade gift for parties or the holidays.
To make candy bark, simply melt your candy, pour it into a large cookie sheet tray (usually 9 x 13 in. will work for this), and top with your favorite candies, sprinkles or icing decorations. Once it sets, break it up into large pieces and serve.
Candy Brush Strokes
Use a brush or a spatula to spread a thin layer of candy on parchment paper. Once set, these candy strokes can be added to cakes or cupcakes for height and dimension, or can be used to form wings, leaves and feathers.
Candy Curls
Candy curls are a fun way to dress up cakes, cupcakes or even hot chocolate! Made by layering melted candy in a small loaf pan, then shaving with a vegetable peeler, candy curls are a fun and simple way to add color and texture to your desserts.
Do Candy Melts Expire?
Though they will last a while if stored properly, Candy Melts are best used within 18 months of the date they were made. Each package contains a stamped series of numbers and letters to help mark the date they were packaged. We use a Julian Date calendar and go off the first five digits of this code. For example: 19114, the first two numbers are the year (2019), and the last three numbers (114) are the day of the year out of 365, which is April 24.
How to Store Candy Melts Candy
The great thing about Candy Melts is that leftover melted candy, or candy that has dripped off your treat and is crumb-free, can be re-melted and re-used. To keep your candy as fresh as possible, follow these simple storage instructions.
- Allow pre-melted candy to cool completely.
- Place candy (or leftover candy wafers) in an airtight plastic bag or container.
- Store your candy in a cool, dry place. Do not freeze or refrigerate your candy, as the moisture from these cold environments can be absorbed into your candy, causing uneven melting.
Projects and Recipes Using Candy Melts


You can find even more projects, recipes and creative candy inspiration here!
Have you made anything with Candy Melts candy recently? Share a picture of your creations on social media and tag us @wiltoncakes so we can see them!


Why does my chocolate turn a grayish color after I dip my pretzels or other items?
Hi! I bought some Wilton candy melts last fall and have not opened the bag. I cannot tell if they are expired because there is no “best by” or expiration date. The stamp that you mentioned in the article is there but the numbers don’t match up with what was indicated. The numbers on my bag are: 18353WO3. Maybe the 18 is the year? But I bought them in October 2020 from a craft store… maybe you can help me decipher this better? Thank you!!
Hi Rachel, 18353WO3 is December 19, 2018. Candy Melts are freshest if used within 18 months. If the Candy Melts are out of their freshness range, they are not harmful if consumed, but they may not perform or taste as a fresh batch would.
I can’t tell you how much I appreciated reading this. I knew candy melts could be used for covering cakes. But I obviously didn’t know how until reading this. I just melted the candy melts and poured it over the cake, then decorated it. We couldn’t cut the cake. Now I know the correct way to do it and will make my granddaughter another cake. Thank you so much.
Hi Lynn, that’s great to hear! We’re happy to know this helped. Good luck on your new cake for granddaughter. Happy Baking! 🙂